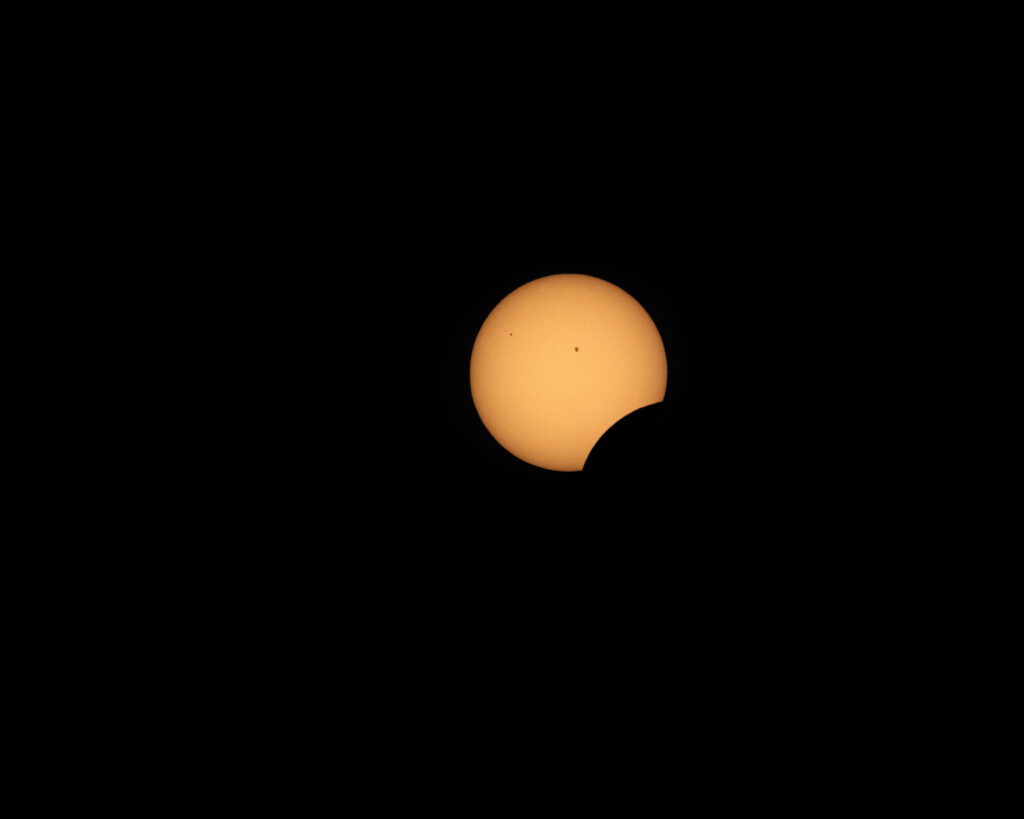
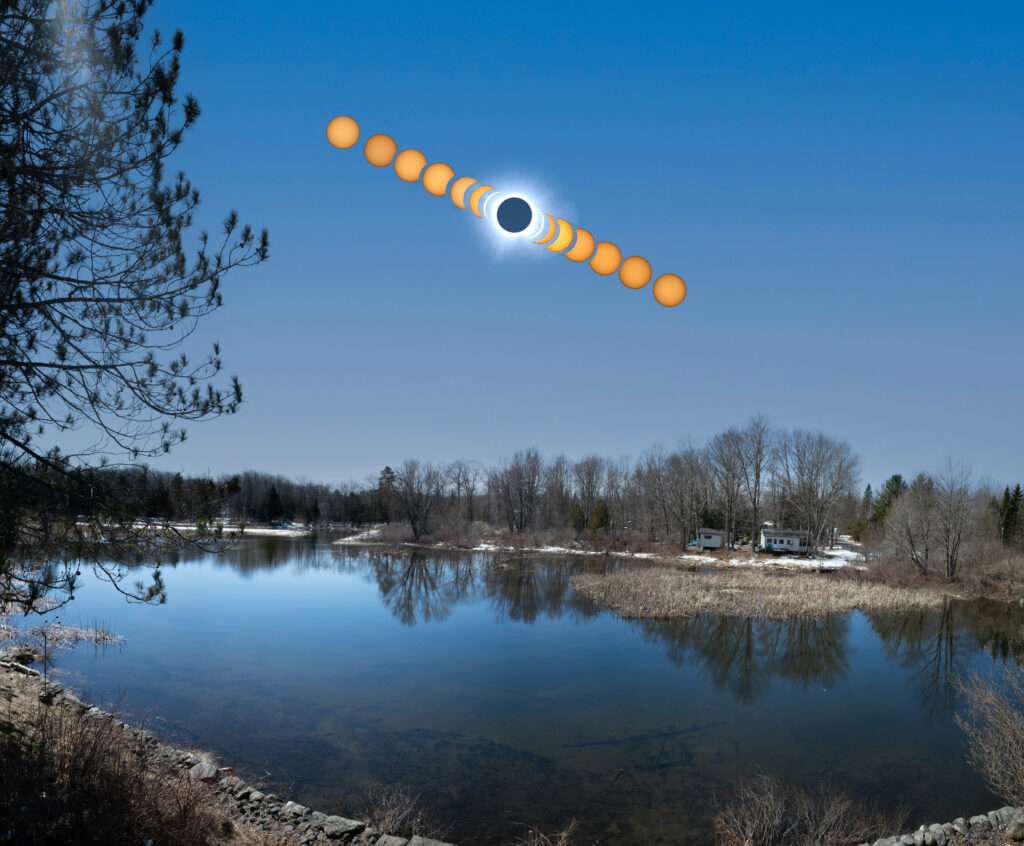
On April 8th 2024, a total eclipse of the sun was witnessed across North America, from Mexico to Newfoundland.

I had been thinking about the eclipse since Christmas, but I only started planning in earnest the beginning of March, just one month before the big event. After procrastinating a year, I decided to buy a SkyWatcher Equatorial mount. Certainly the coming eclipse was the deciding factor as having a mount capable of tracking the sun would greatly simplify matters.
In preparation, my goal was to have a “day-of” plan that clearly laid out, without ambiguity, the steps I needed to take and precisely when. It was key that this plan minimise on-the-spot thinking and decision-making. Ideally the procedures would be highly optimised. My research covered a range of topics necessary to understand so a plan could be created, including: setting up and using the equatorial mount; general preparation recommendations for the eclipse; tools and camera equipment needed; sample photographs and post-processing techniques.
Under the tools and equipment category, several sources suggested that a 400mm lens was a good size, long enough to get close to the sun, but also wide enough to capture the full corona. All sources noted a filter was necessary, to avoid damaging the equipment. However, there was some disagreement on the type of filter, and specifically whether the [super-high] density glass filters could blockout harmful radiation (beyond just bright light). As these filters often cost $100 or more, and their highly specialized nature, I decided to use solar filter sheets as these were both significantly less expensive and there was no question about their reliability.
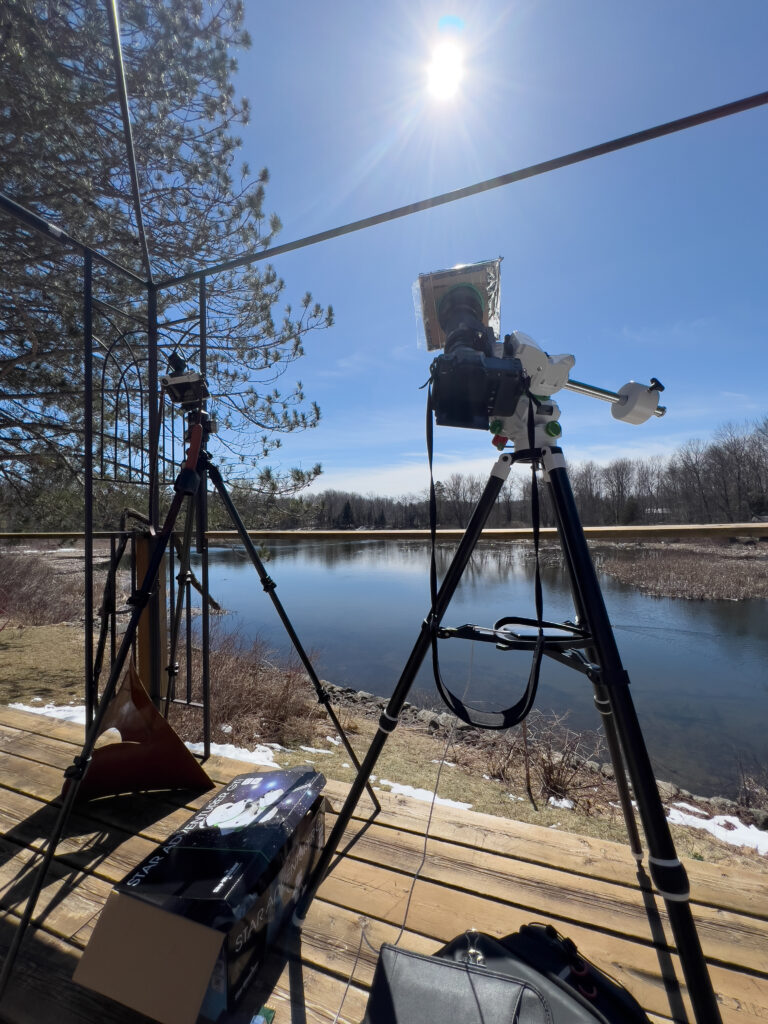
I purchased two 6″x6″ Solar Filter Sheets from Thousand Oaks Optical, and while some say it is sufficient to simply lay the sheets over the lens and secure them with a rubber band, I realised it would be necessary to quickly remove and then reattach the filter at the beginning and end of totality. I therefore constructed a frame for the sheets out of cardboard that fit snugly over my lens.
I decided I would use a second camera to try to capture the wider sky during totality. In that period of near total darkness, stars should become visible, as well, so would Jupiter and Venus. A bonus was the Pons-Brooks comet was also in range, although it was unclear whether it would be visible. Using the program Stellarium I was able to determine that a 35mm lens would be wide enough to capture the moon, Jupiter, Venus, and the comet, if visible.

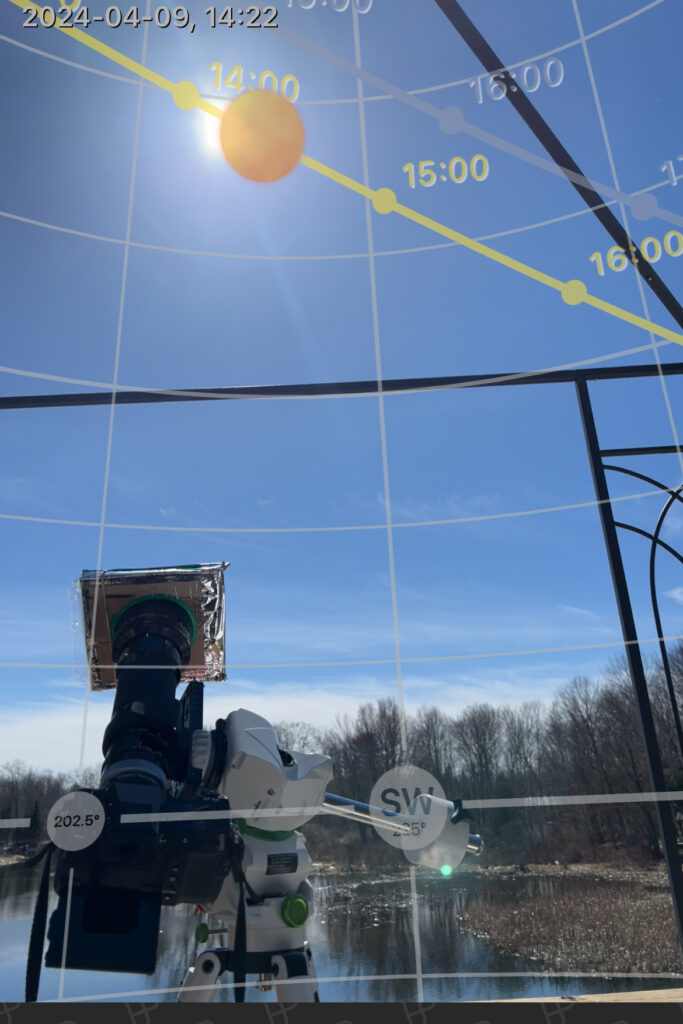
My next question was location. Using an interactive map (Jubier, 2024b) I was able to identify multiple locations within a couple hours of home. Several communities along the north shore of Lake Erie were designating viewing areas, and among them was Long Beach Provincial Park who were taking reservations. Having a guaranteed spot was essential. Long Beach, on the path of totality, is located on the north shore of Lake Erie guaranteeing an unobstructed view. I used the PhotoPills App to confirm where the sun would be between 1:00PM and 4:30PM on April 8th.


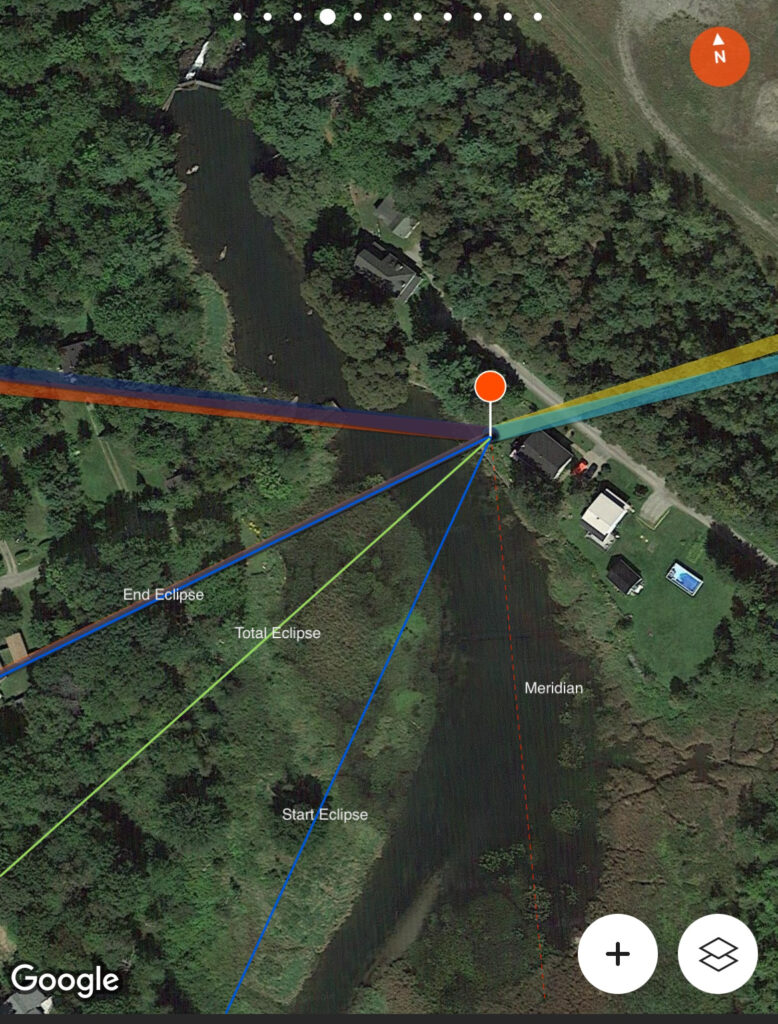
The interactive map (Jubier, 2024b) also provided timing information, and specifically: the time for the start of the partial eclipse (C1); the start of totality (C2); the end of totality (C3) and; the end of the eclipse (C4). This information allowed me to create a timeline and then calculate how many pictures I could take during the partial eclipse periods and what I had time for during totality. For the “day-of”, I used an App (Solar Eclipse Timer — SET) to orally announce key points during the event. This was another simplifying step, avoiding the need to manually set up separate reminders and look at a watch or phone.
I used a time exposure calculator (Jubier, 2024c) to determine camera settings during the eclipse period, from beginning to end. This information was foundational for determining my camera configuration and settings.
As the equatorial mount was new to me, I spent a lot of time researching how to set it up to track the sun, and to keep it on track. The mount I purchased came with an App (SyncScan), which also became part of the learning curve. This app is required to set up the mount prior to each viewing and then to align it (to the North Star) so it will correctly track the target object. However, the challenge faced when tracking the sun is the North Star not visible. It was thus necessary to find a technique to align the mount during the day. For that I used another App, PS Align Pro.
With all this information, I prepared a first draft of the “day of” plan that laid out exactly what I needed to do at each point in time during eclipse day. But just as important, I prepared checklists for the camera settings and the mount’s setup. My primary objective with these checklists was to make sure I didn’t forget anything, but secondarily, I wanted to put as much “work” into the setup so as to minimise work during the event.

Over a period of about 3 weeks I repeatedly tested the checklists and procedures to both correct and optimize them. While many of the tests focused on specific tasks, I included full runs, from start to finish, executing at exactly the same time as the eclipse itself. Among other things, this helped me confirm whether I had enough batteries (I didn’t: I had to buy an external battery to power my phones), how well my wifi worked (I discovered I needed separate iPhones for the mount and camera, so I brought an old phone out of retirement), the amount of drift off centre (i.e., how well the mount tracked). As a result I made a number of refinements to my original decisions and assumptions.
I had originally planned to use my M10-R with a 400mm lens to capture the sun during the eclipse. However, testing showed this camera had difficulty sustaining a high-speed burst more than 10-15 seconds which would be necessary at C2 and C3. Furthermore, it was able to bracket only 5 shots, which would be a limiting factor during totality. So I decided to use my GFX, with a 400mm lens plus a 1.5 extender, which could bracket 9 shots, and had longer burst capabilities. Another benefit of the GFX was its larger sensor, offering more room to crop, if necessary. I used the M10-R with a 35mm lens to capture the planets and stars during totality.
The actual camera settings were determined through experimentation. For example, while it was recommended to use a fixed speed/aperture/ISO while photographing the sun during the partial phases, I decided that as I had a tracking mount, I could keep the sun centred in my lens, so it would be possible to fix the aperture and ISO, but let the speed adjust according to the changing brightness of the sun. This would avoid the extra steps to adjust the shutter speed.
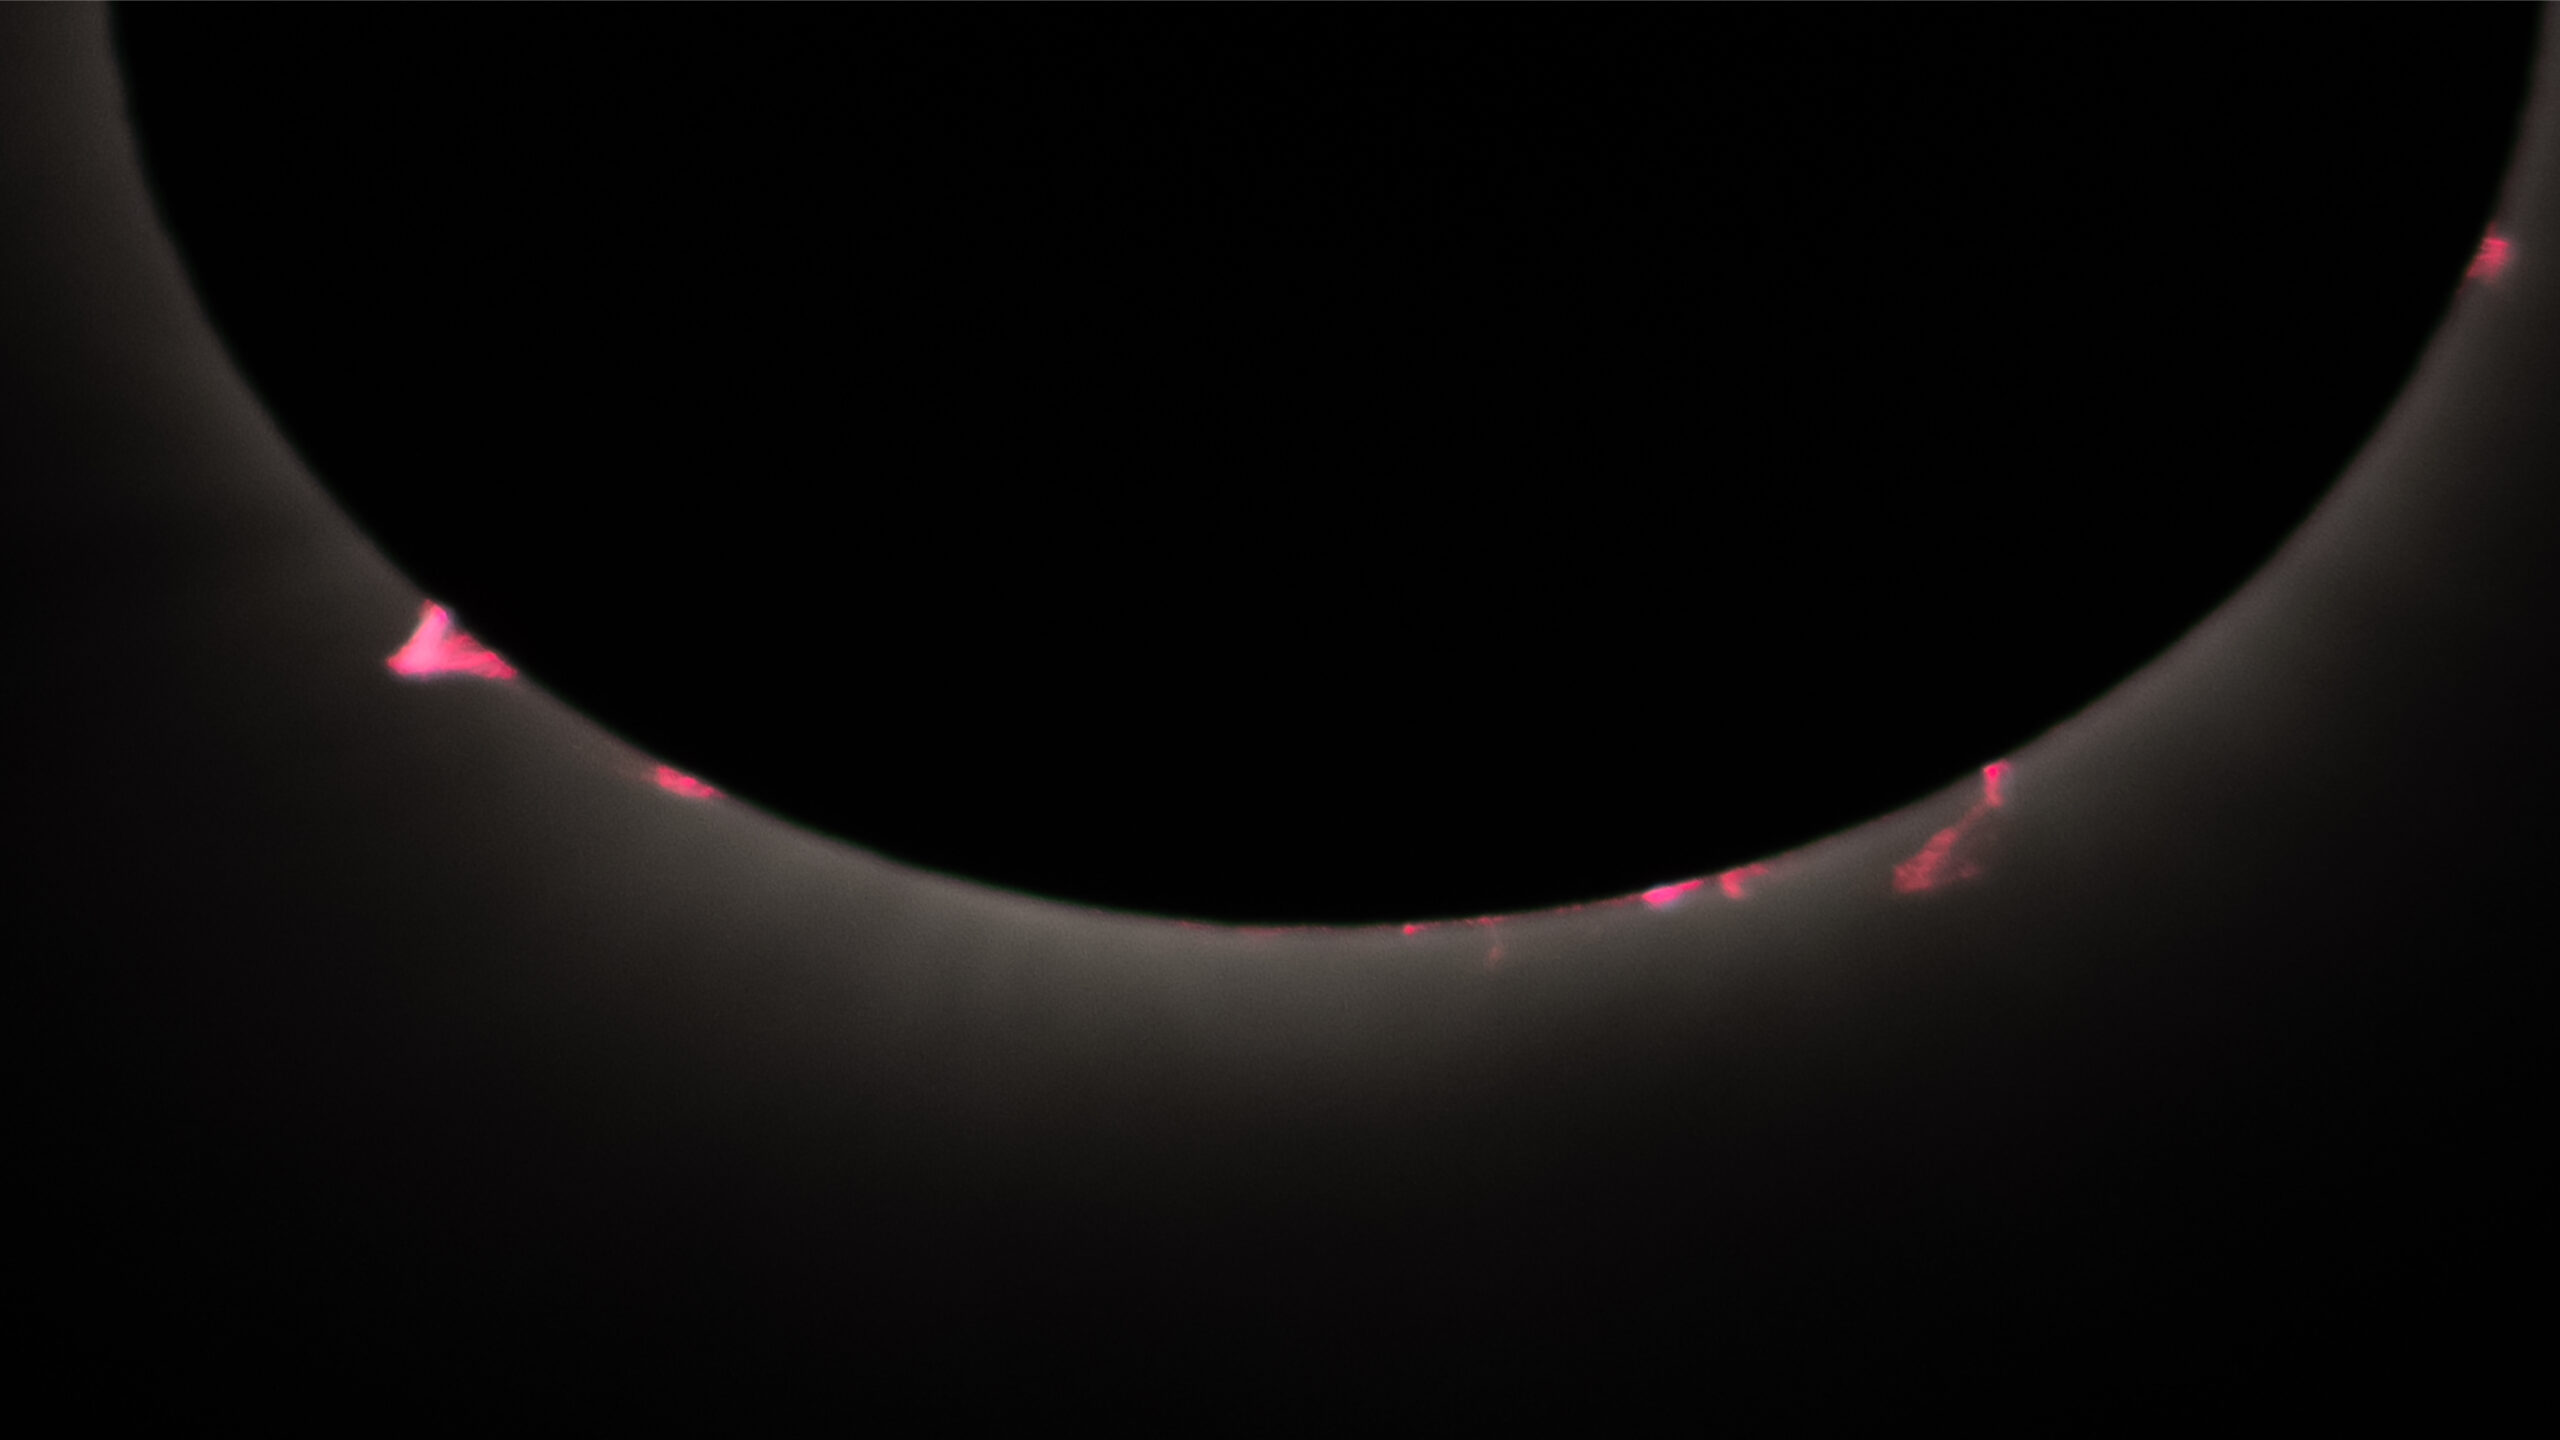
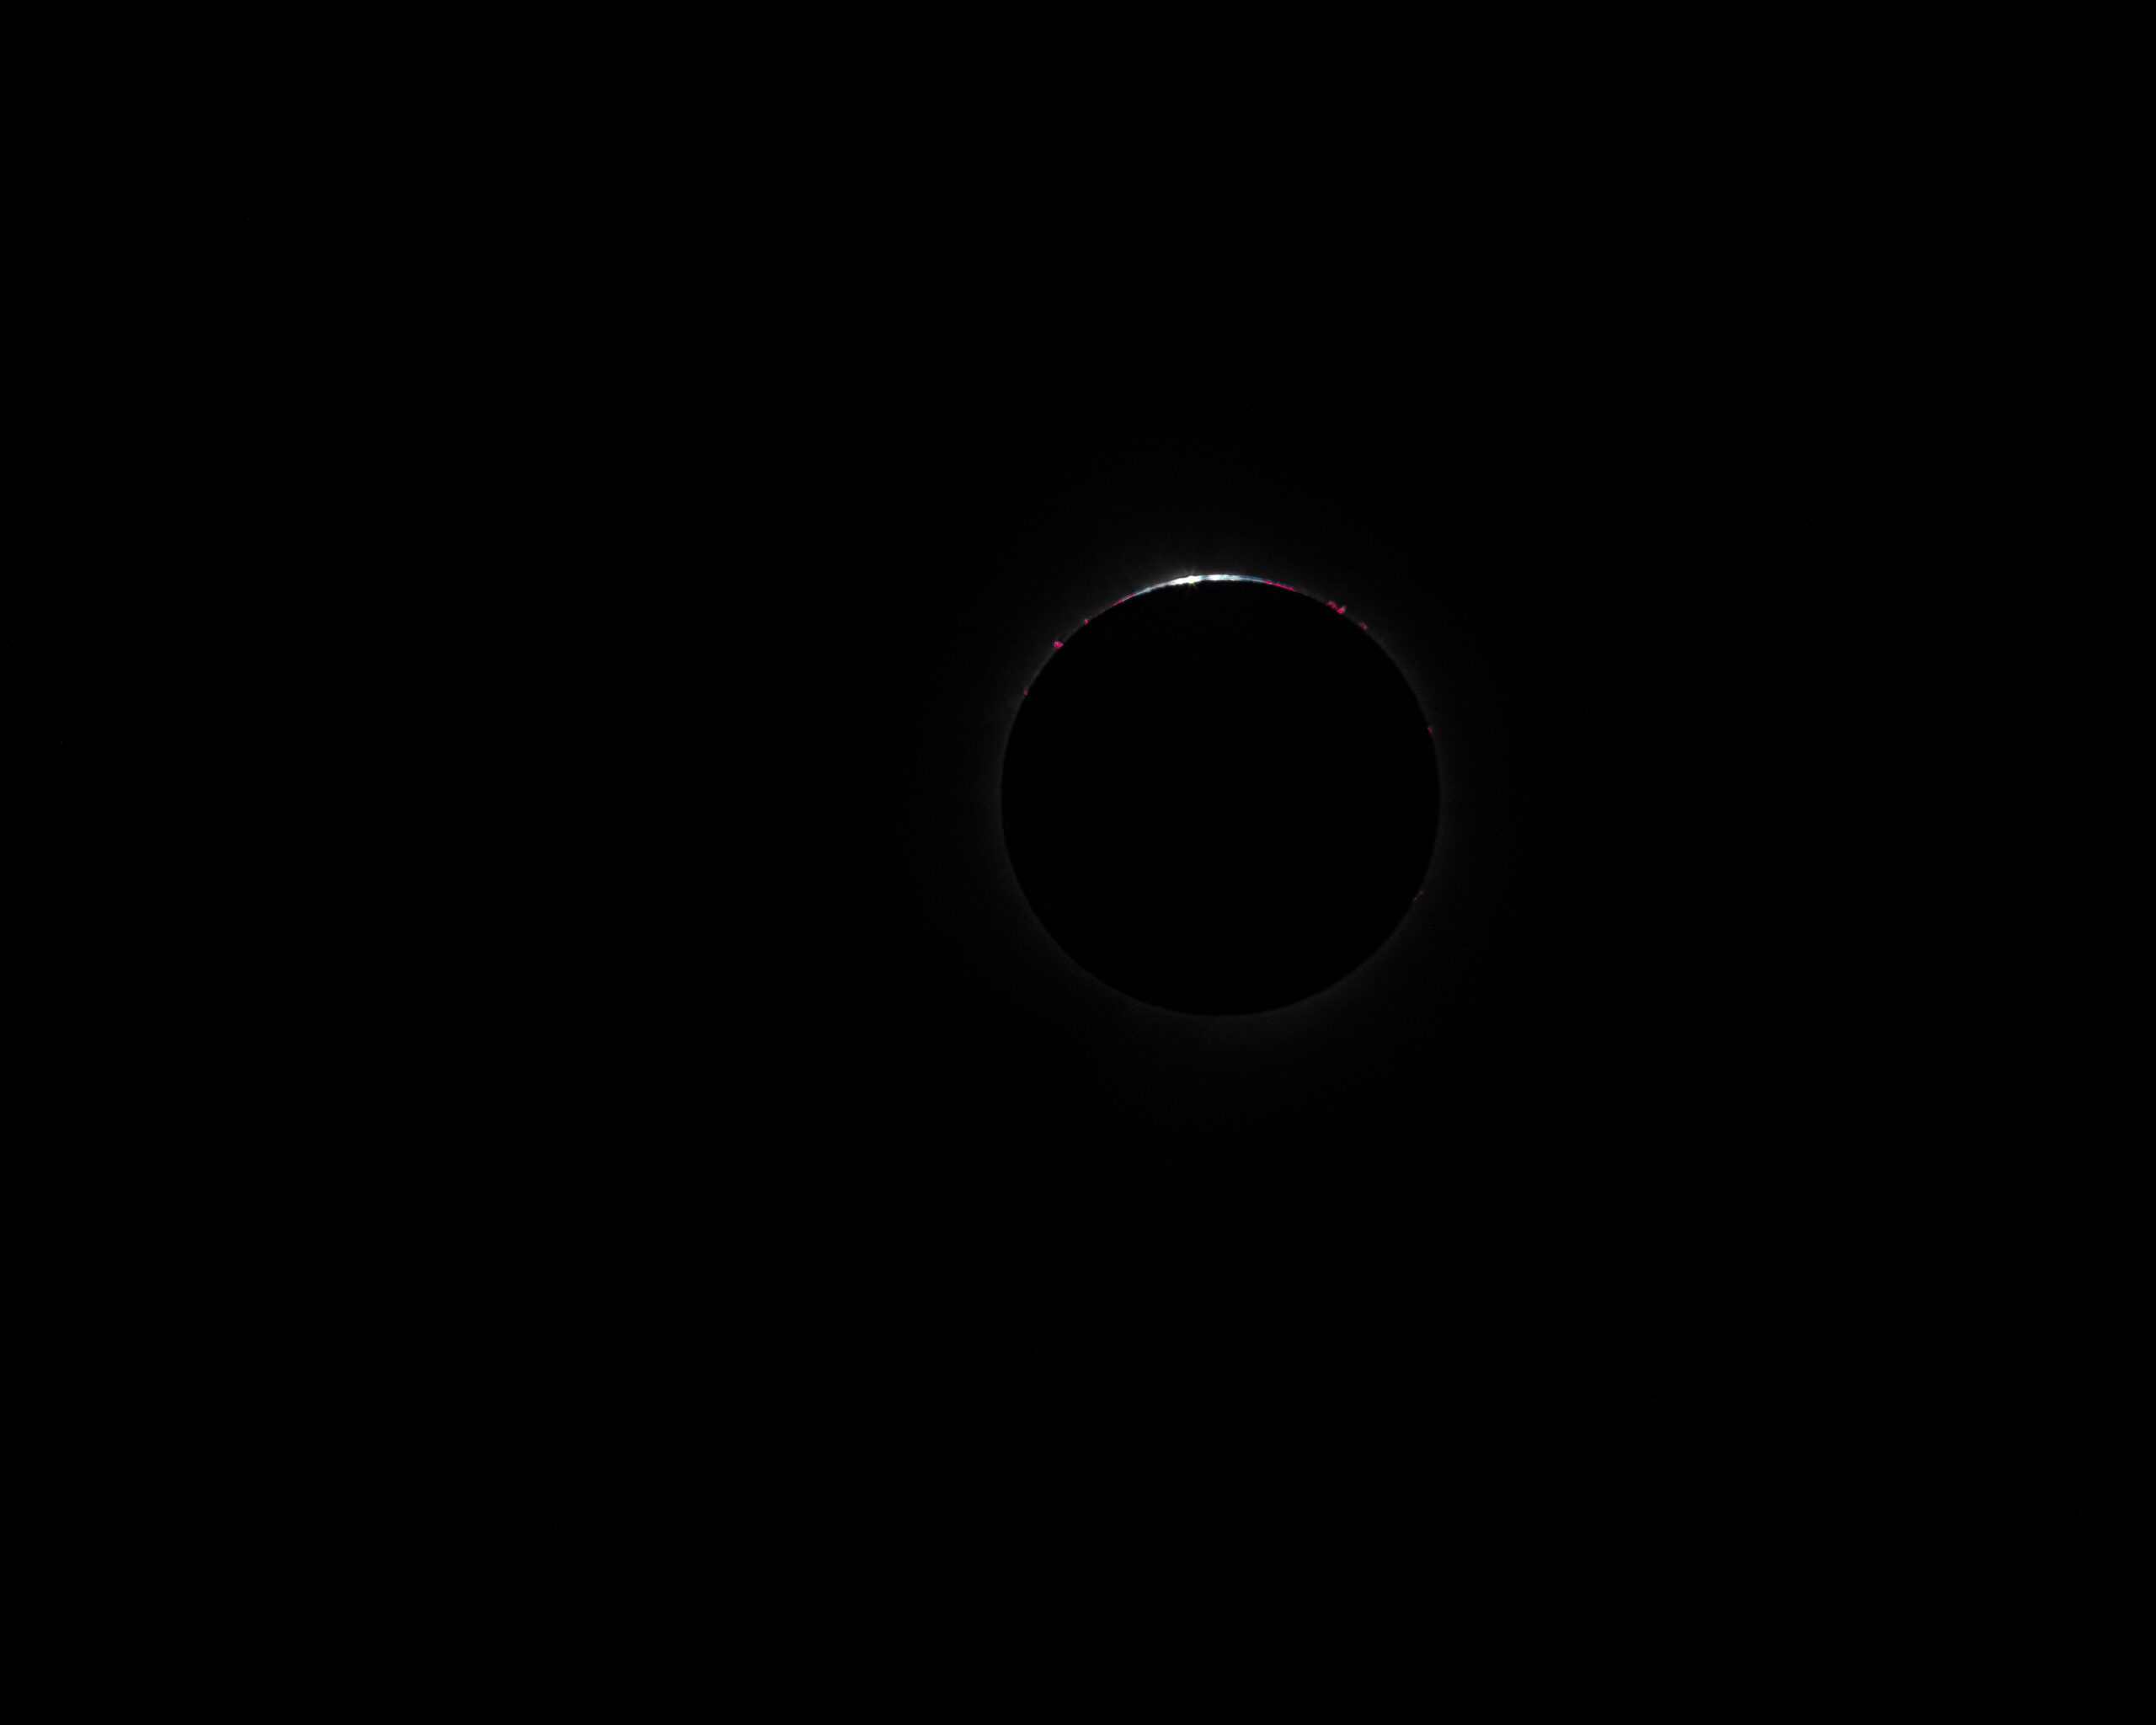
According to (Jubier, 2024a), if I wanted to photograph everything from Baily’s Beads to Earthshine I would need to cover a range from 1/8000th of a second to 2 seconds at f/8, ISO 400. To accomplish this, I setup my bracketing to take 9 shots at 1-2/3 stops apart. In the end this worked reasonably well, as I did capture Baily’s beads, prominences as well as the various layers of corona. I was unable to capture the Earthshine, however. I suspect this detail was lost in the high-level cloud cover.
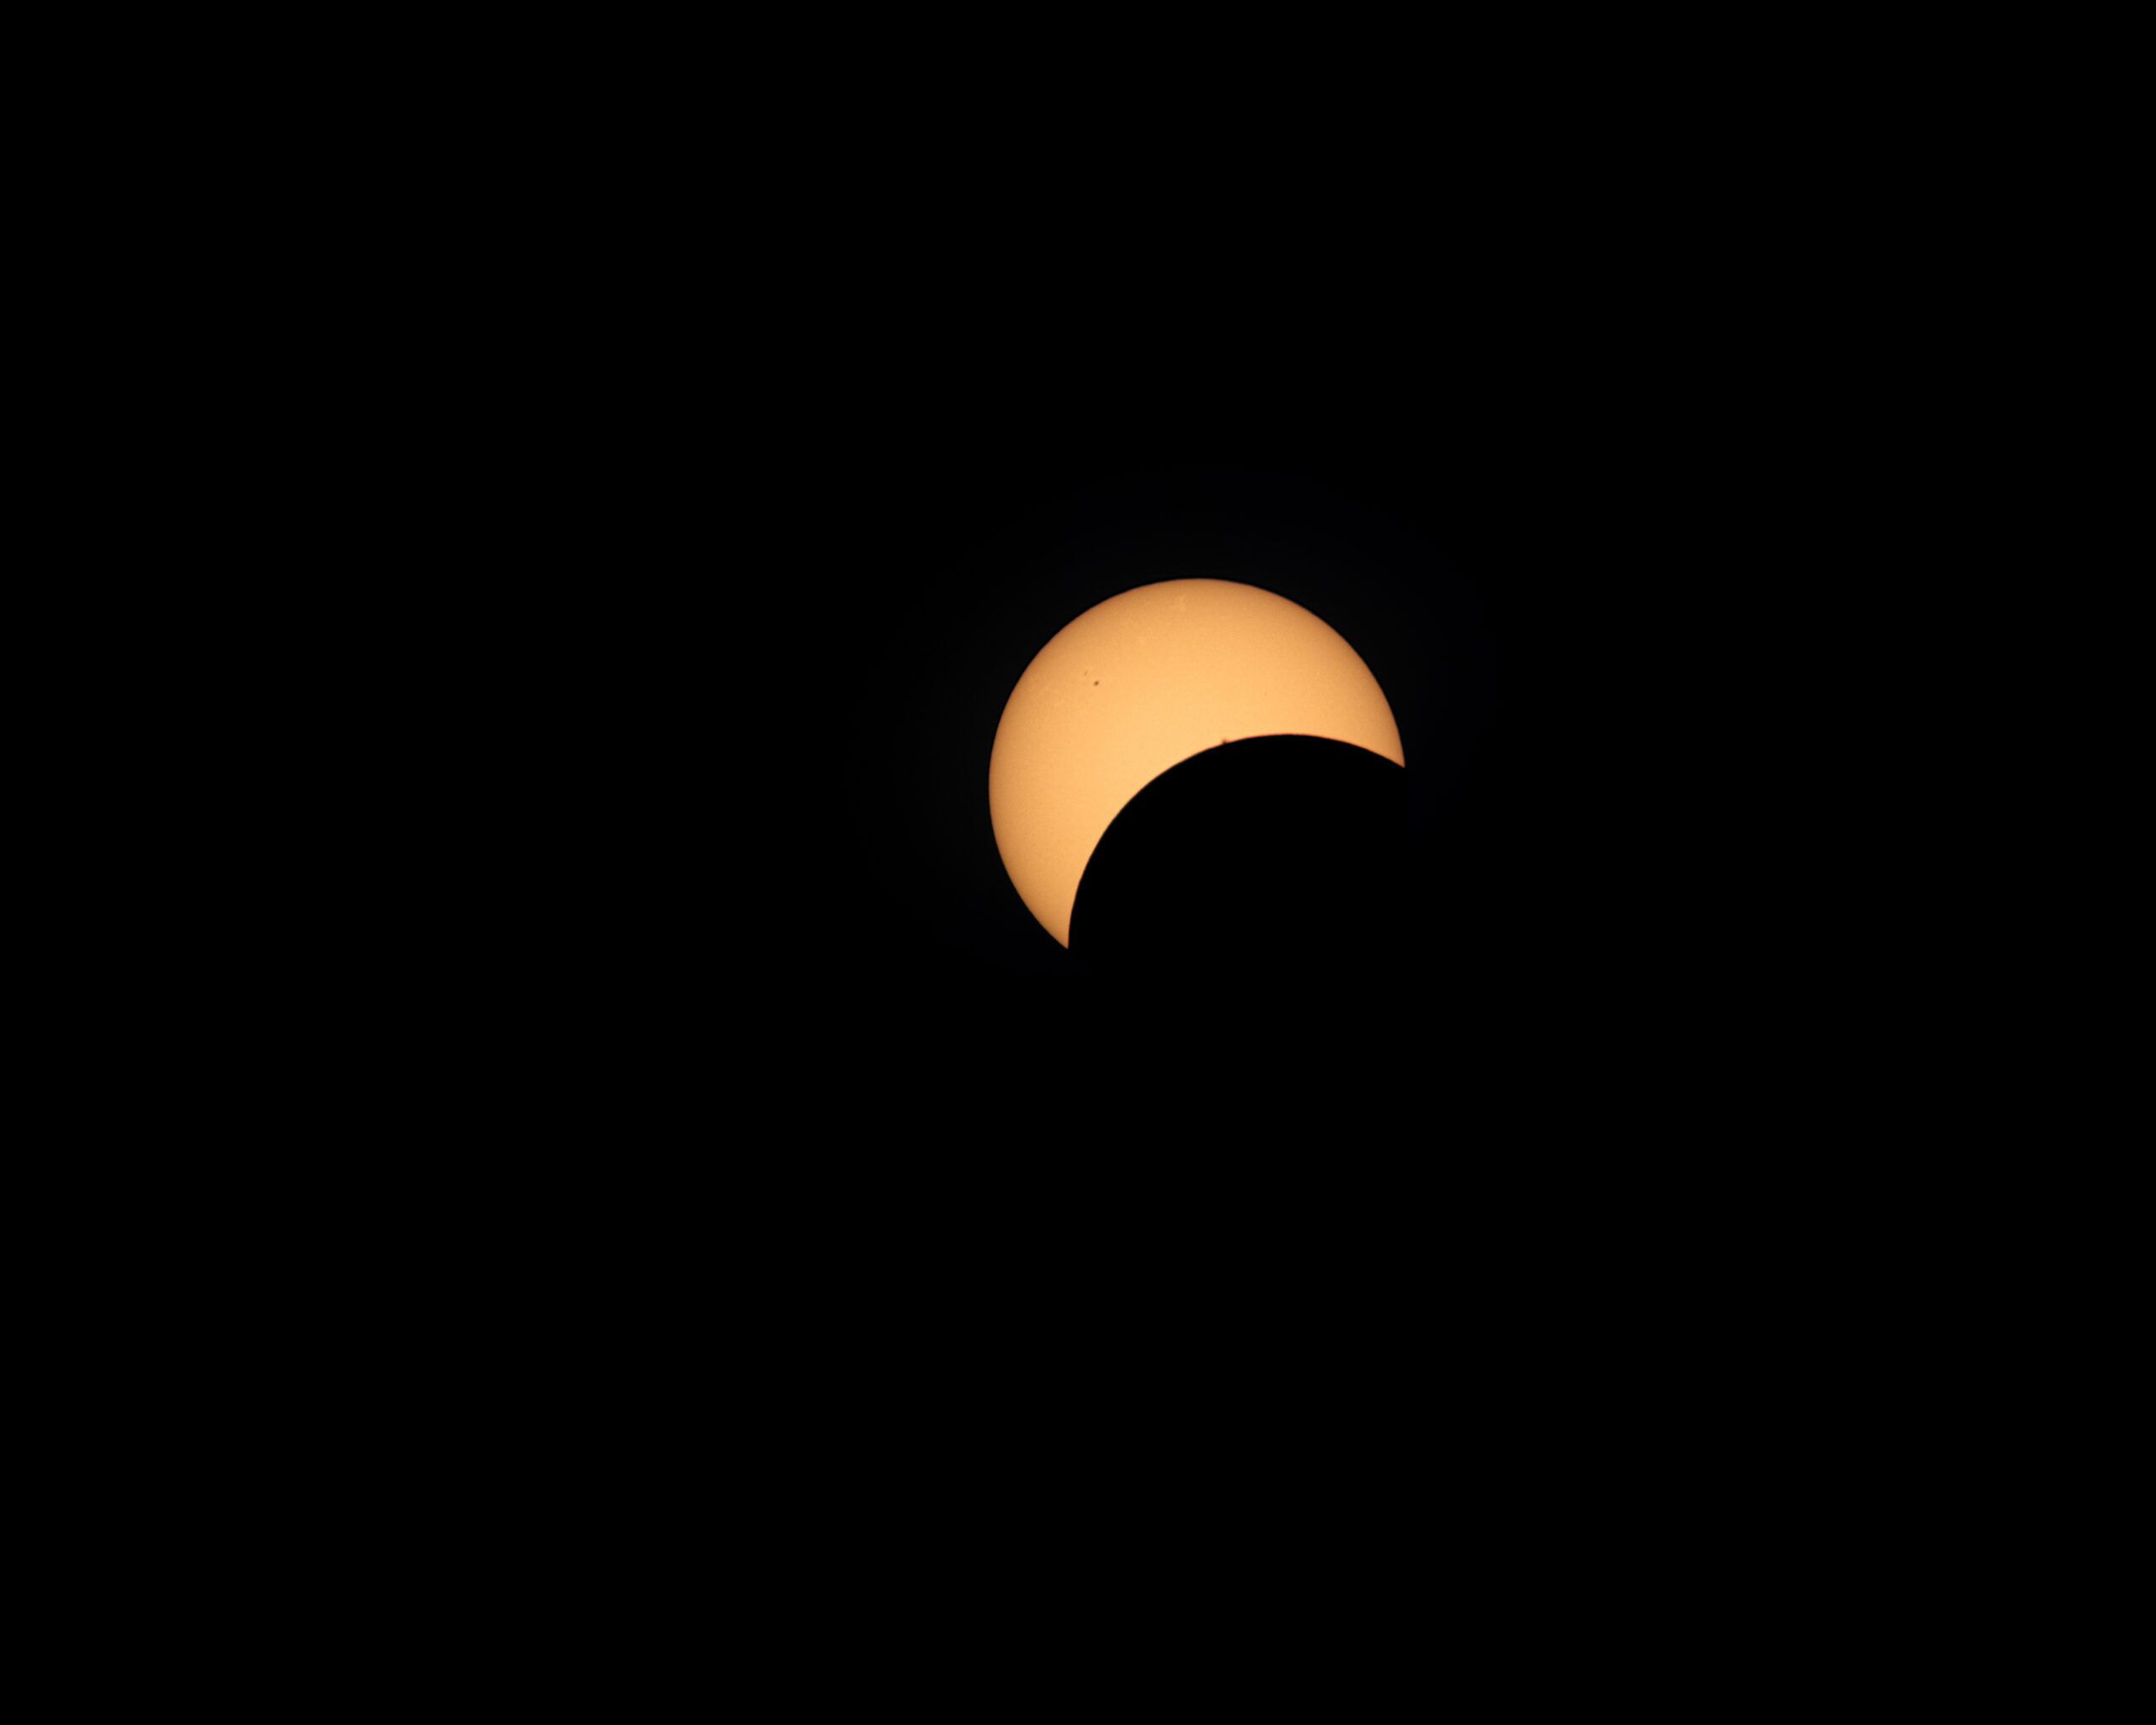
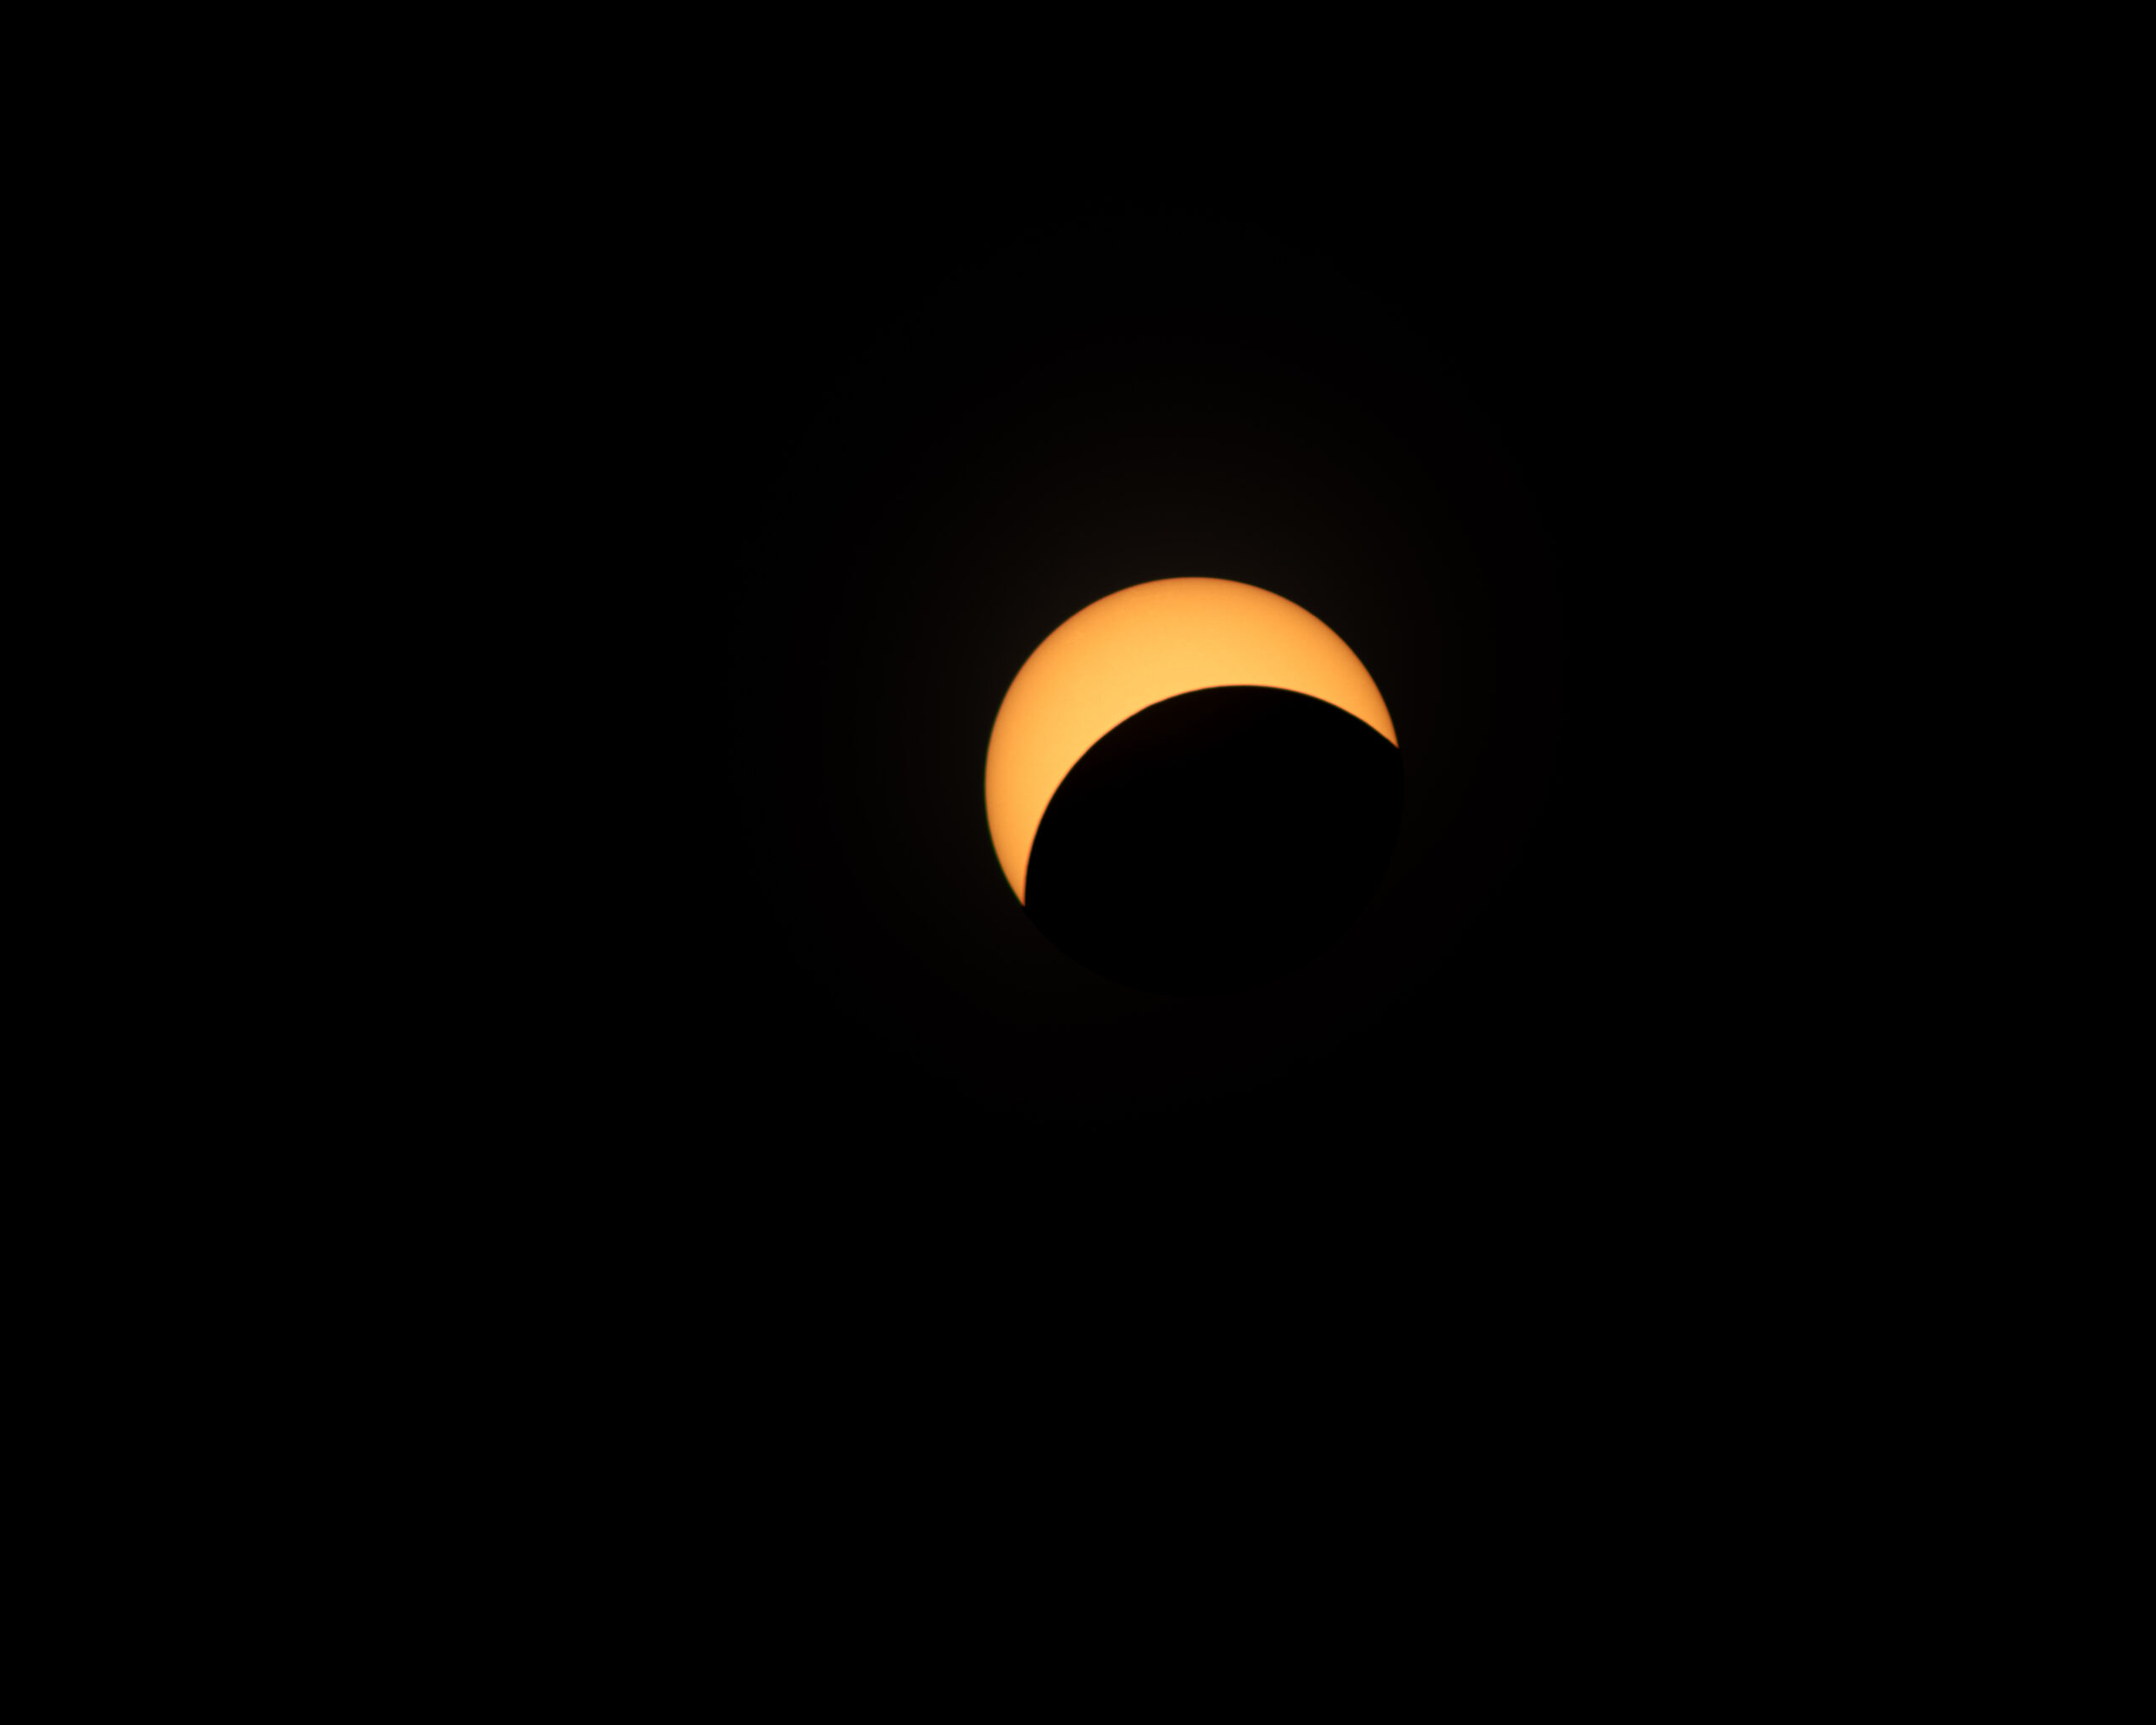
I decided to use ISO 400, rather than the preferred ISO 100, because this would allow faster shutter speeds, and specifically it would avoid using an exposure longer than 2 seconds. To enhance high-speed bursts, I switched from the manual shutter to the camera’s electronic shutter, which seemed to make a difference. During the partial phases the camera was set to take one shot every 5 minutes. During totality I used my remote shutter release on the FujiFilm App to initiate the 9-shot brackets. First, this reduced camera shake as a result of touching the shutter release, and second it allowed me to look up and see the eclipse, rather than looking only at the camera. (Note: the second phone was used to run the ScanSyn App, that controls the mount and keeps it on track. This App needs to be “on” all the time).
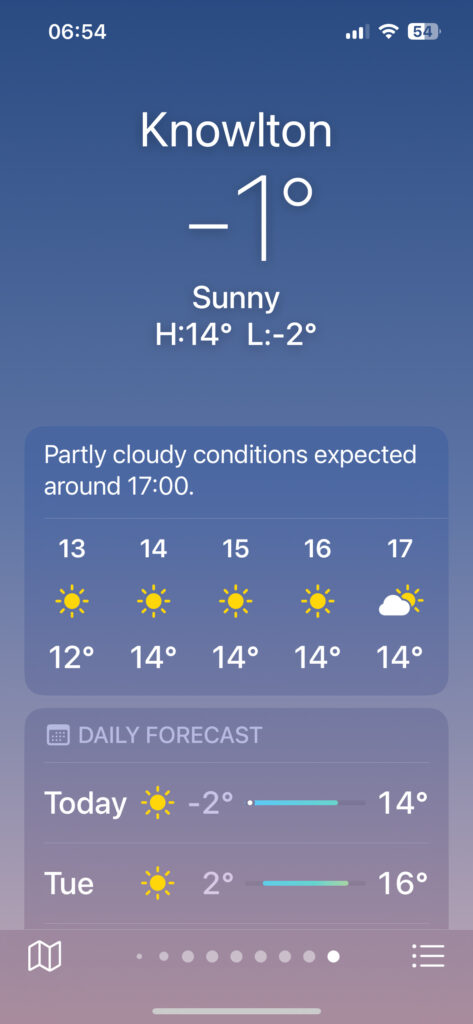
As date approached it was looking less likely that there would be clear weather on the north shore of Lake Erie. On the Friday, before Monday’s event, I made the decision to switch locations to the Eastern Townships in Quebec, and fortunately, I was able to book a hotel in St-Hyacinthe, just an hour away from our destination.
On Sunday we drove down to St-Hyacinthe and spent the night. Monday we continued to our destination, arriving just before noon. I proceeded to set up my equipment and align the mount to the sun. All was going well until I dropped the screw that locks shut the battery case for the mount. Without this screw, the case would not close, which is necessary to hold the batteries in place. Not being in place, the batteries would not power the mount, and thus it would not operate. After a few frantic moments I found the screw, secured it in position and sighed in relief (learning: only change batteries inside, with the mount on a table).
The show was ready to go.
Most went according to plan, with two minor exceptions. First, there were some high clouds, insufficient to impact the eclipse, but they did block the stars and planets during totality. Second, it was dark enough during totality that I could not read the manual dials on my camera (not having my reading glasses didn’t help either), meaning I could take the 9-shot bracket from 1/40th of a second. I don’t think this was a significant failure.
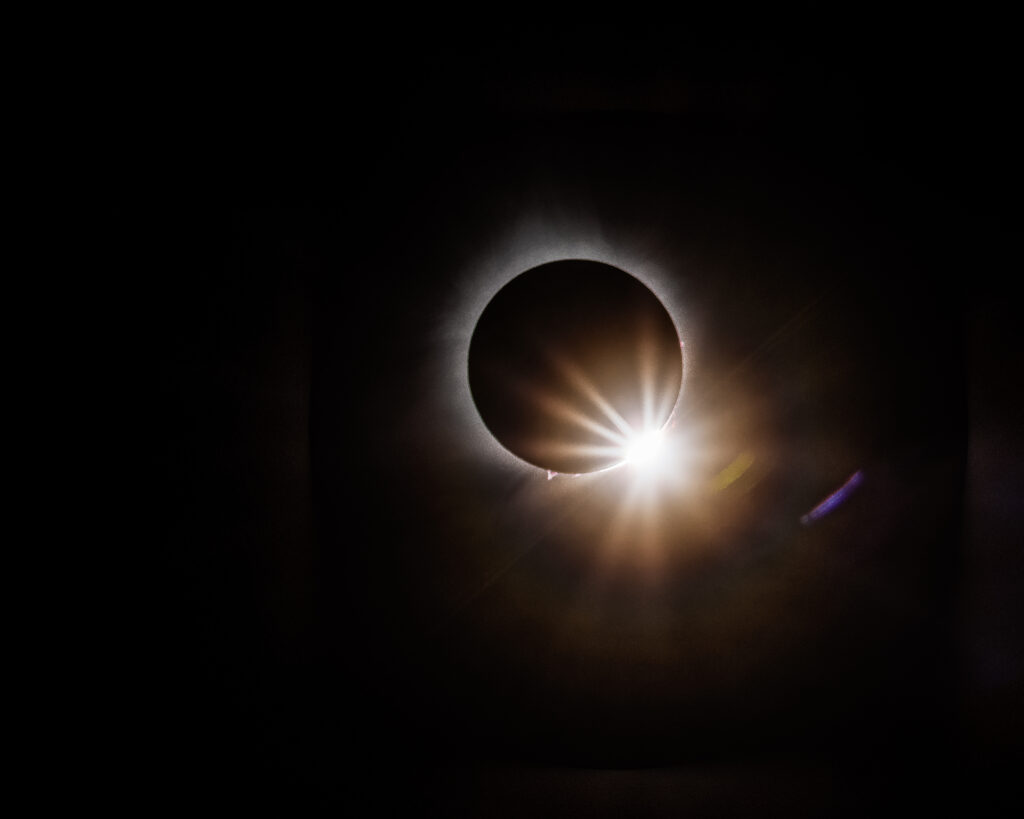
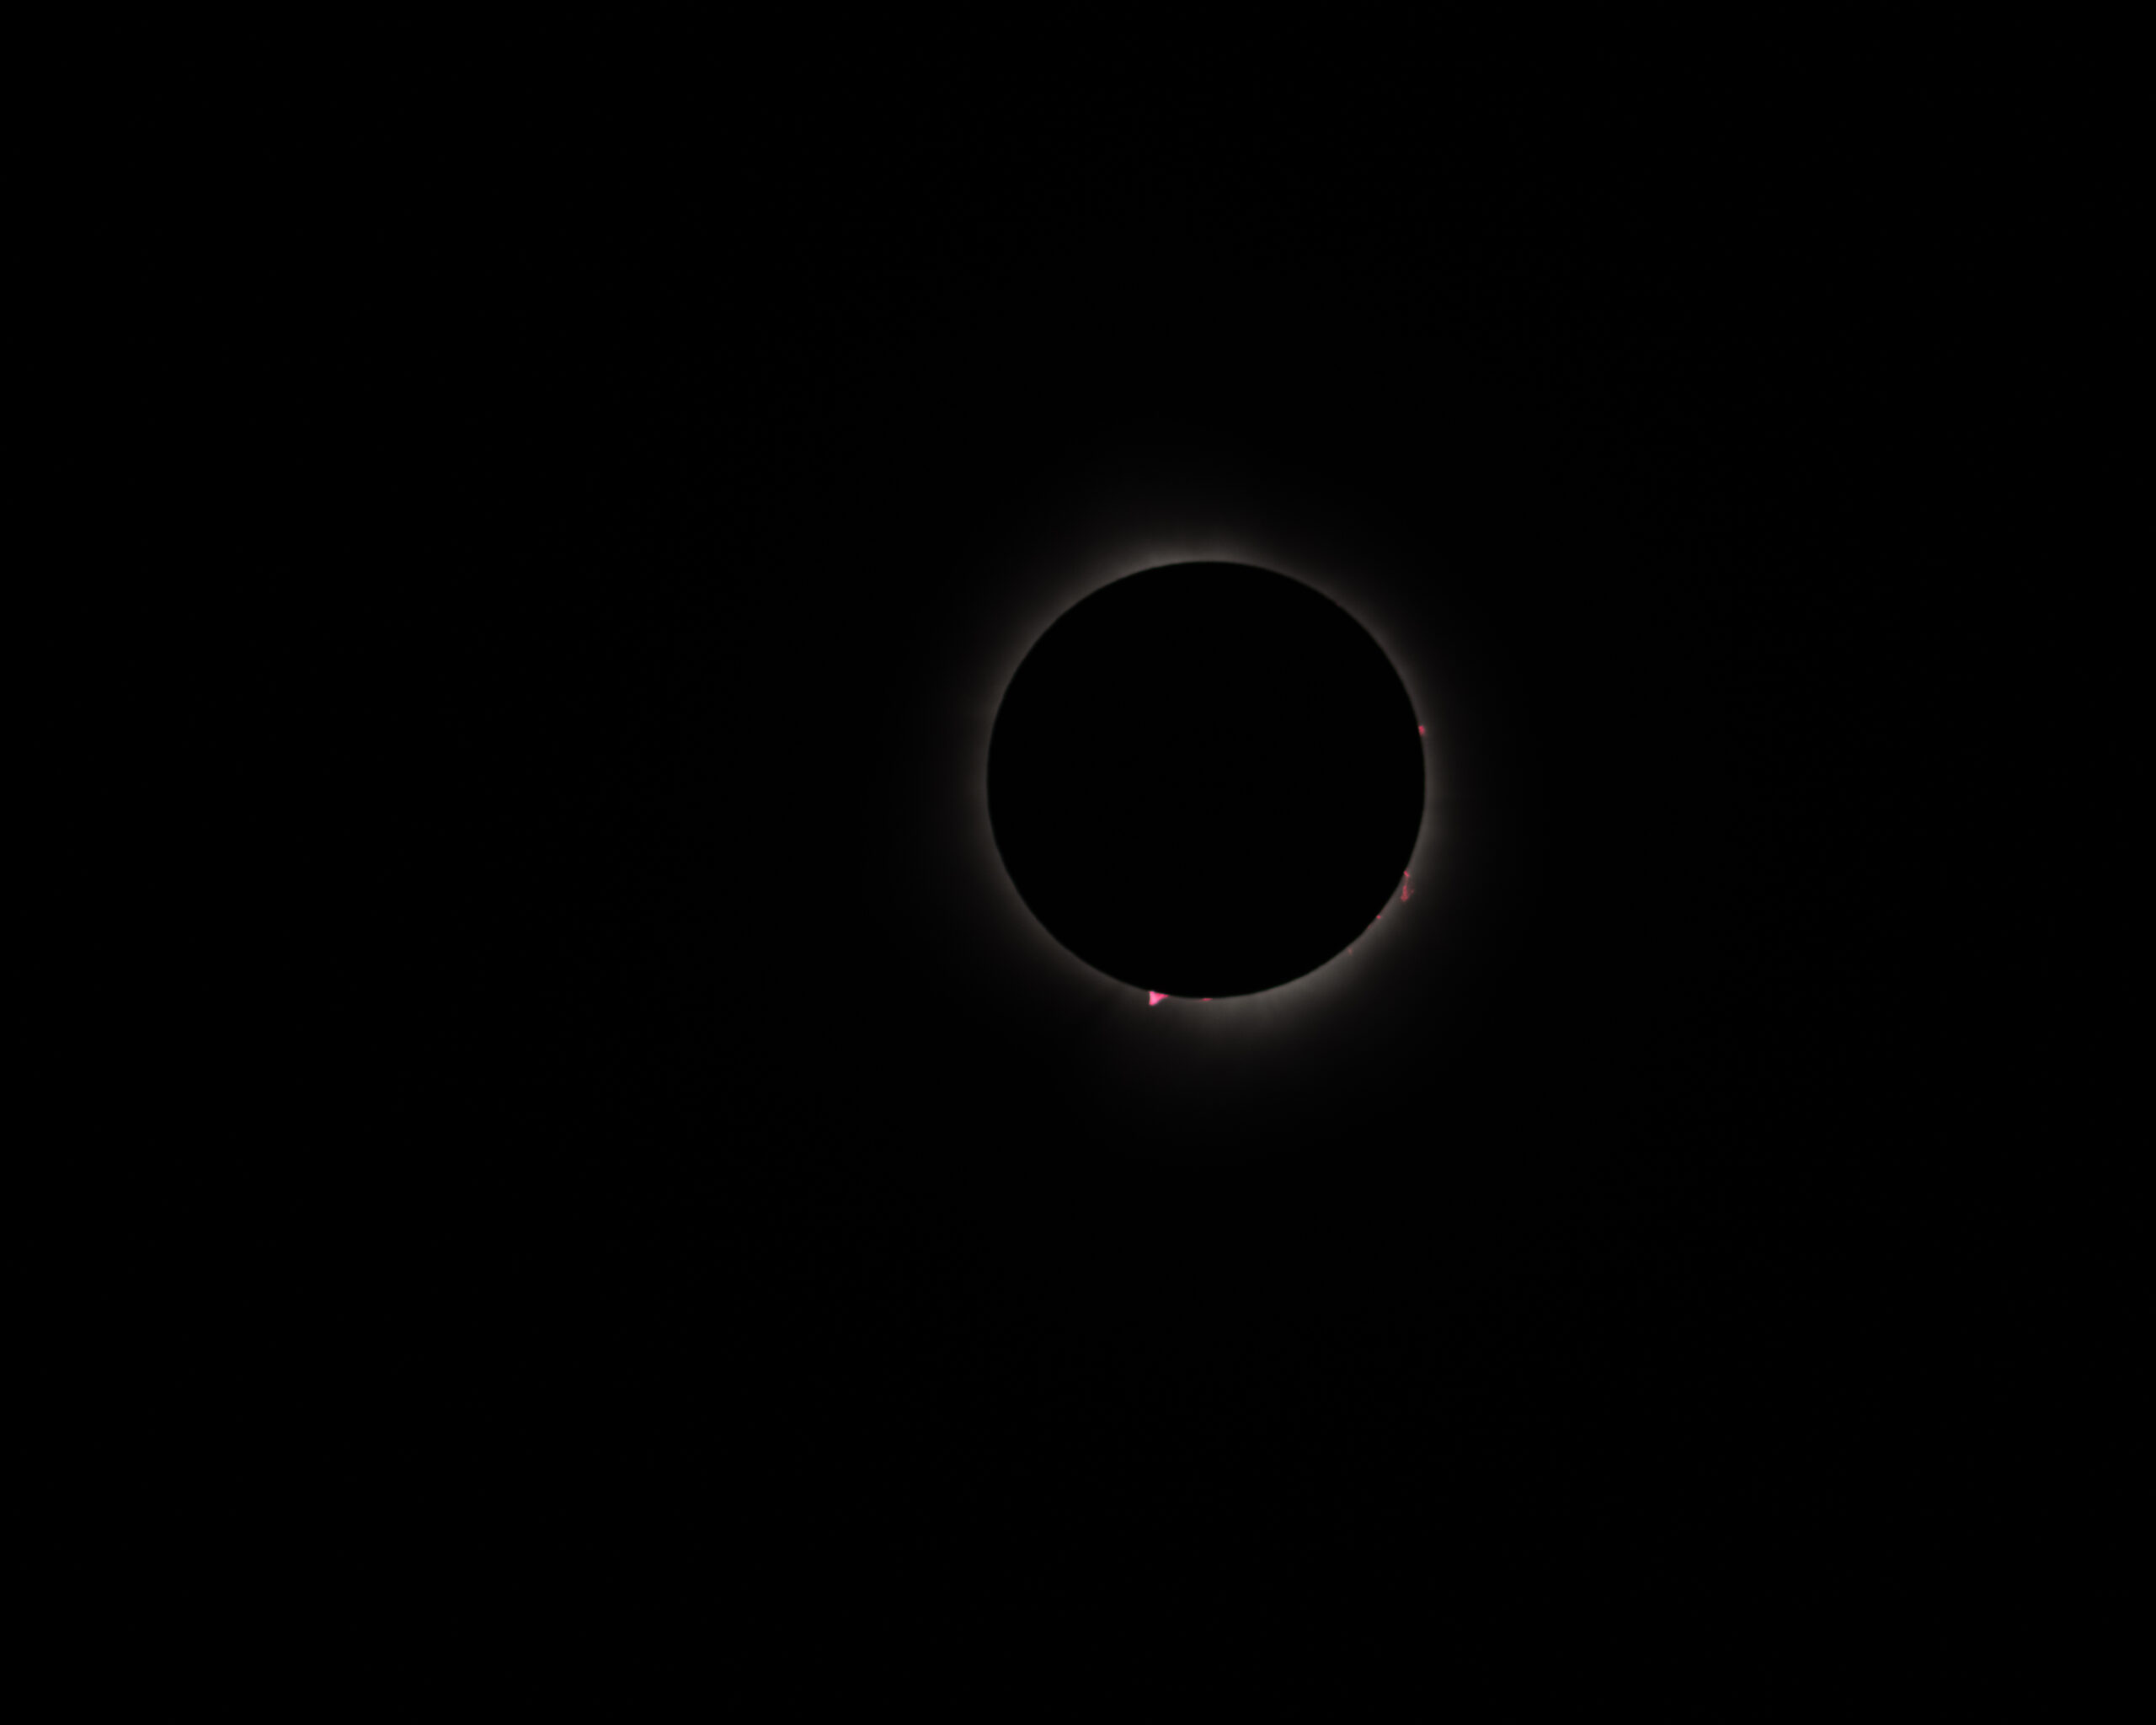
An eclipse is quite a startling event. We were fortunate that it was a warm, bright, and sunny day. Yet, as the eclipse proceeded it became noticeably cooler, to the point where we put on our jackets and sweaters. During totality it was dark, with light only from the corona. The prominences were clearly visible, and to my eye, it looked like they completely wrapped the sun, but the photographs don’t bear this out.


Blog Posts
-
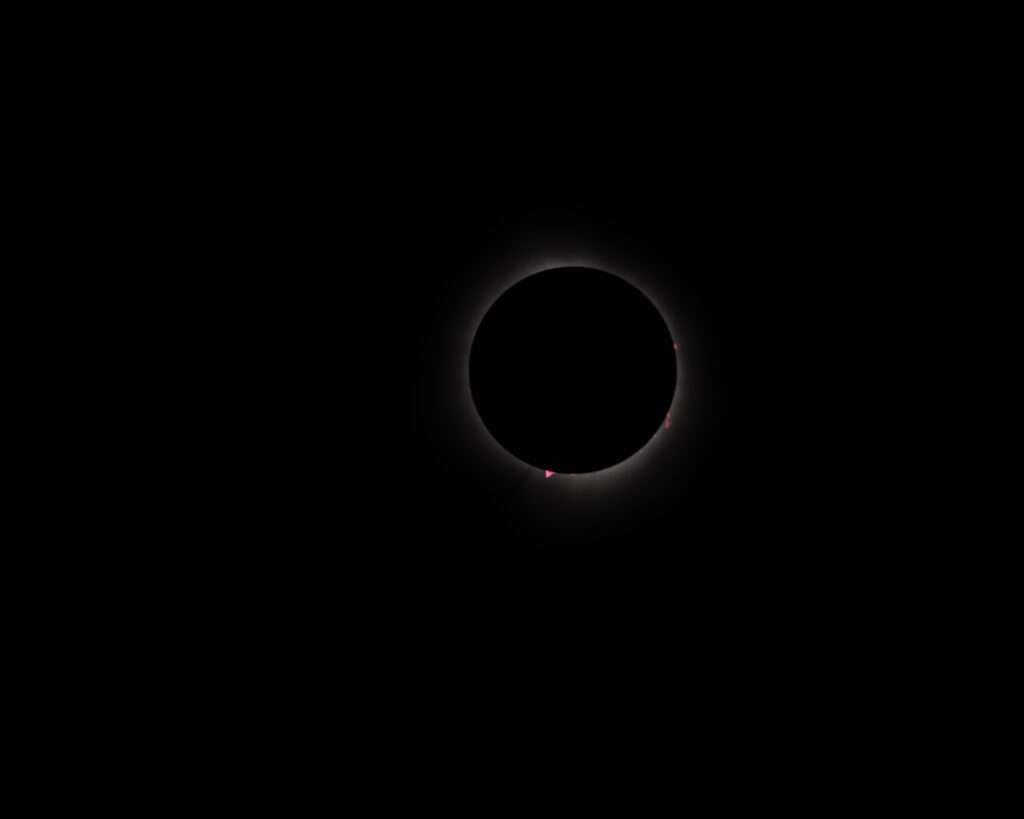
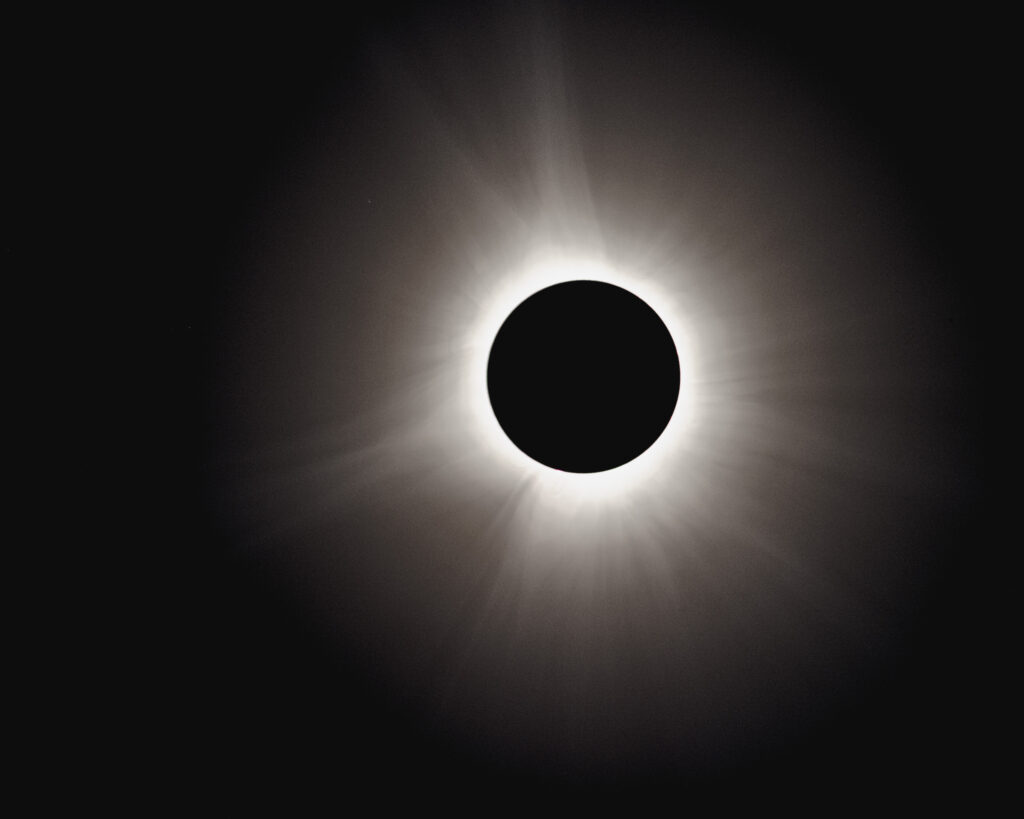
The Total Eclipse

-
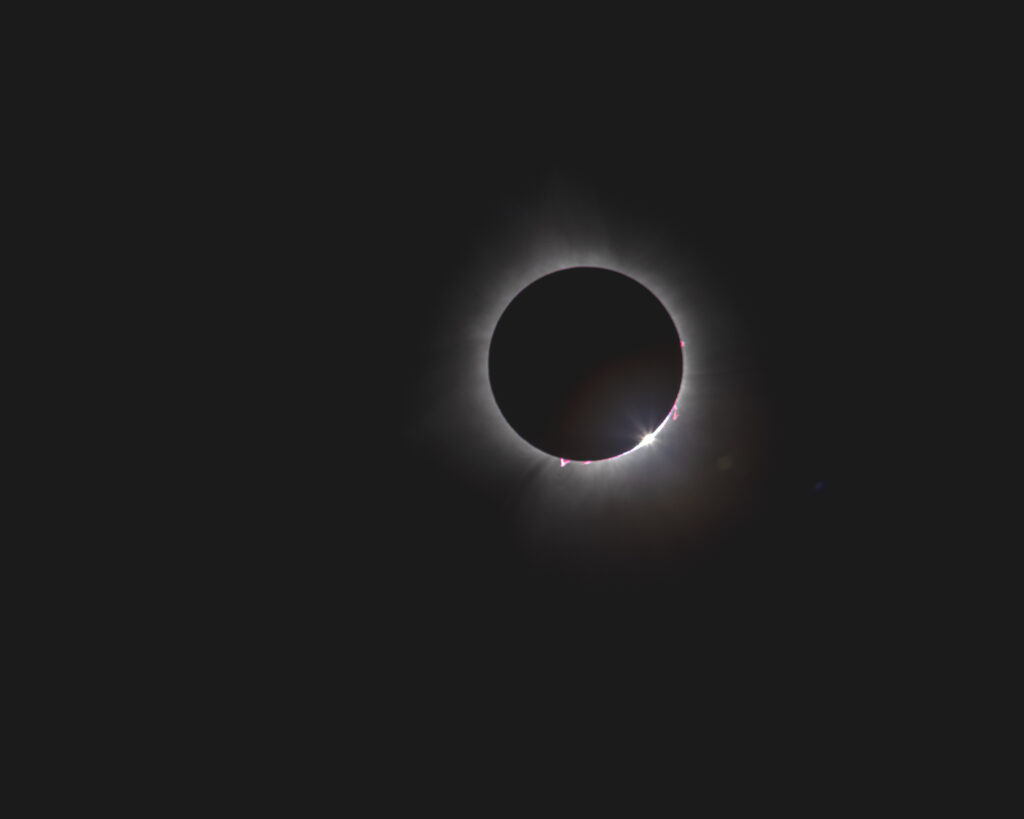
Solar Prominences
-
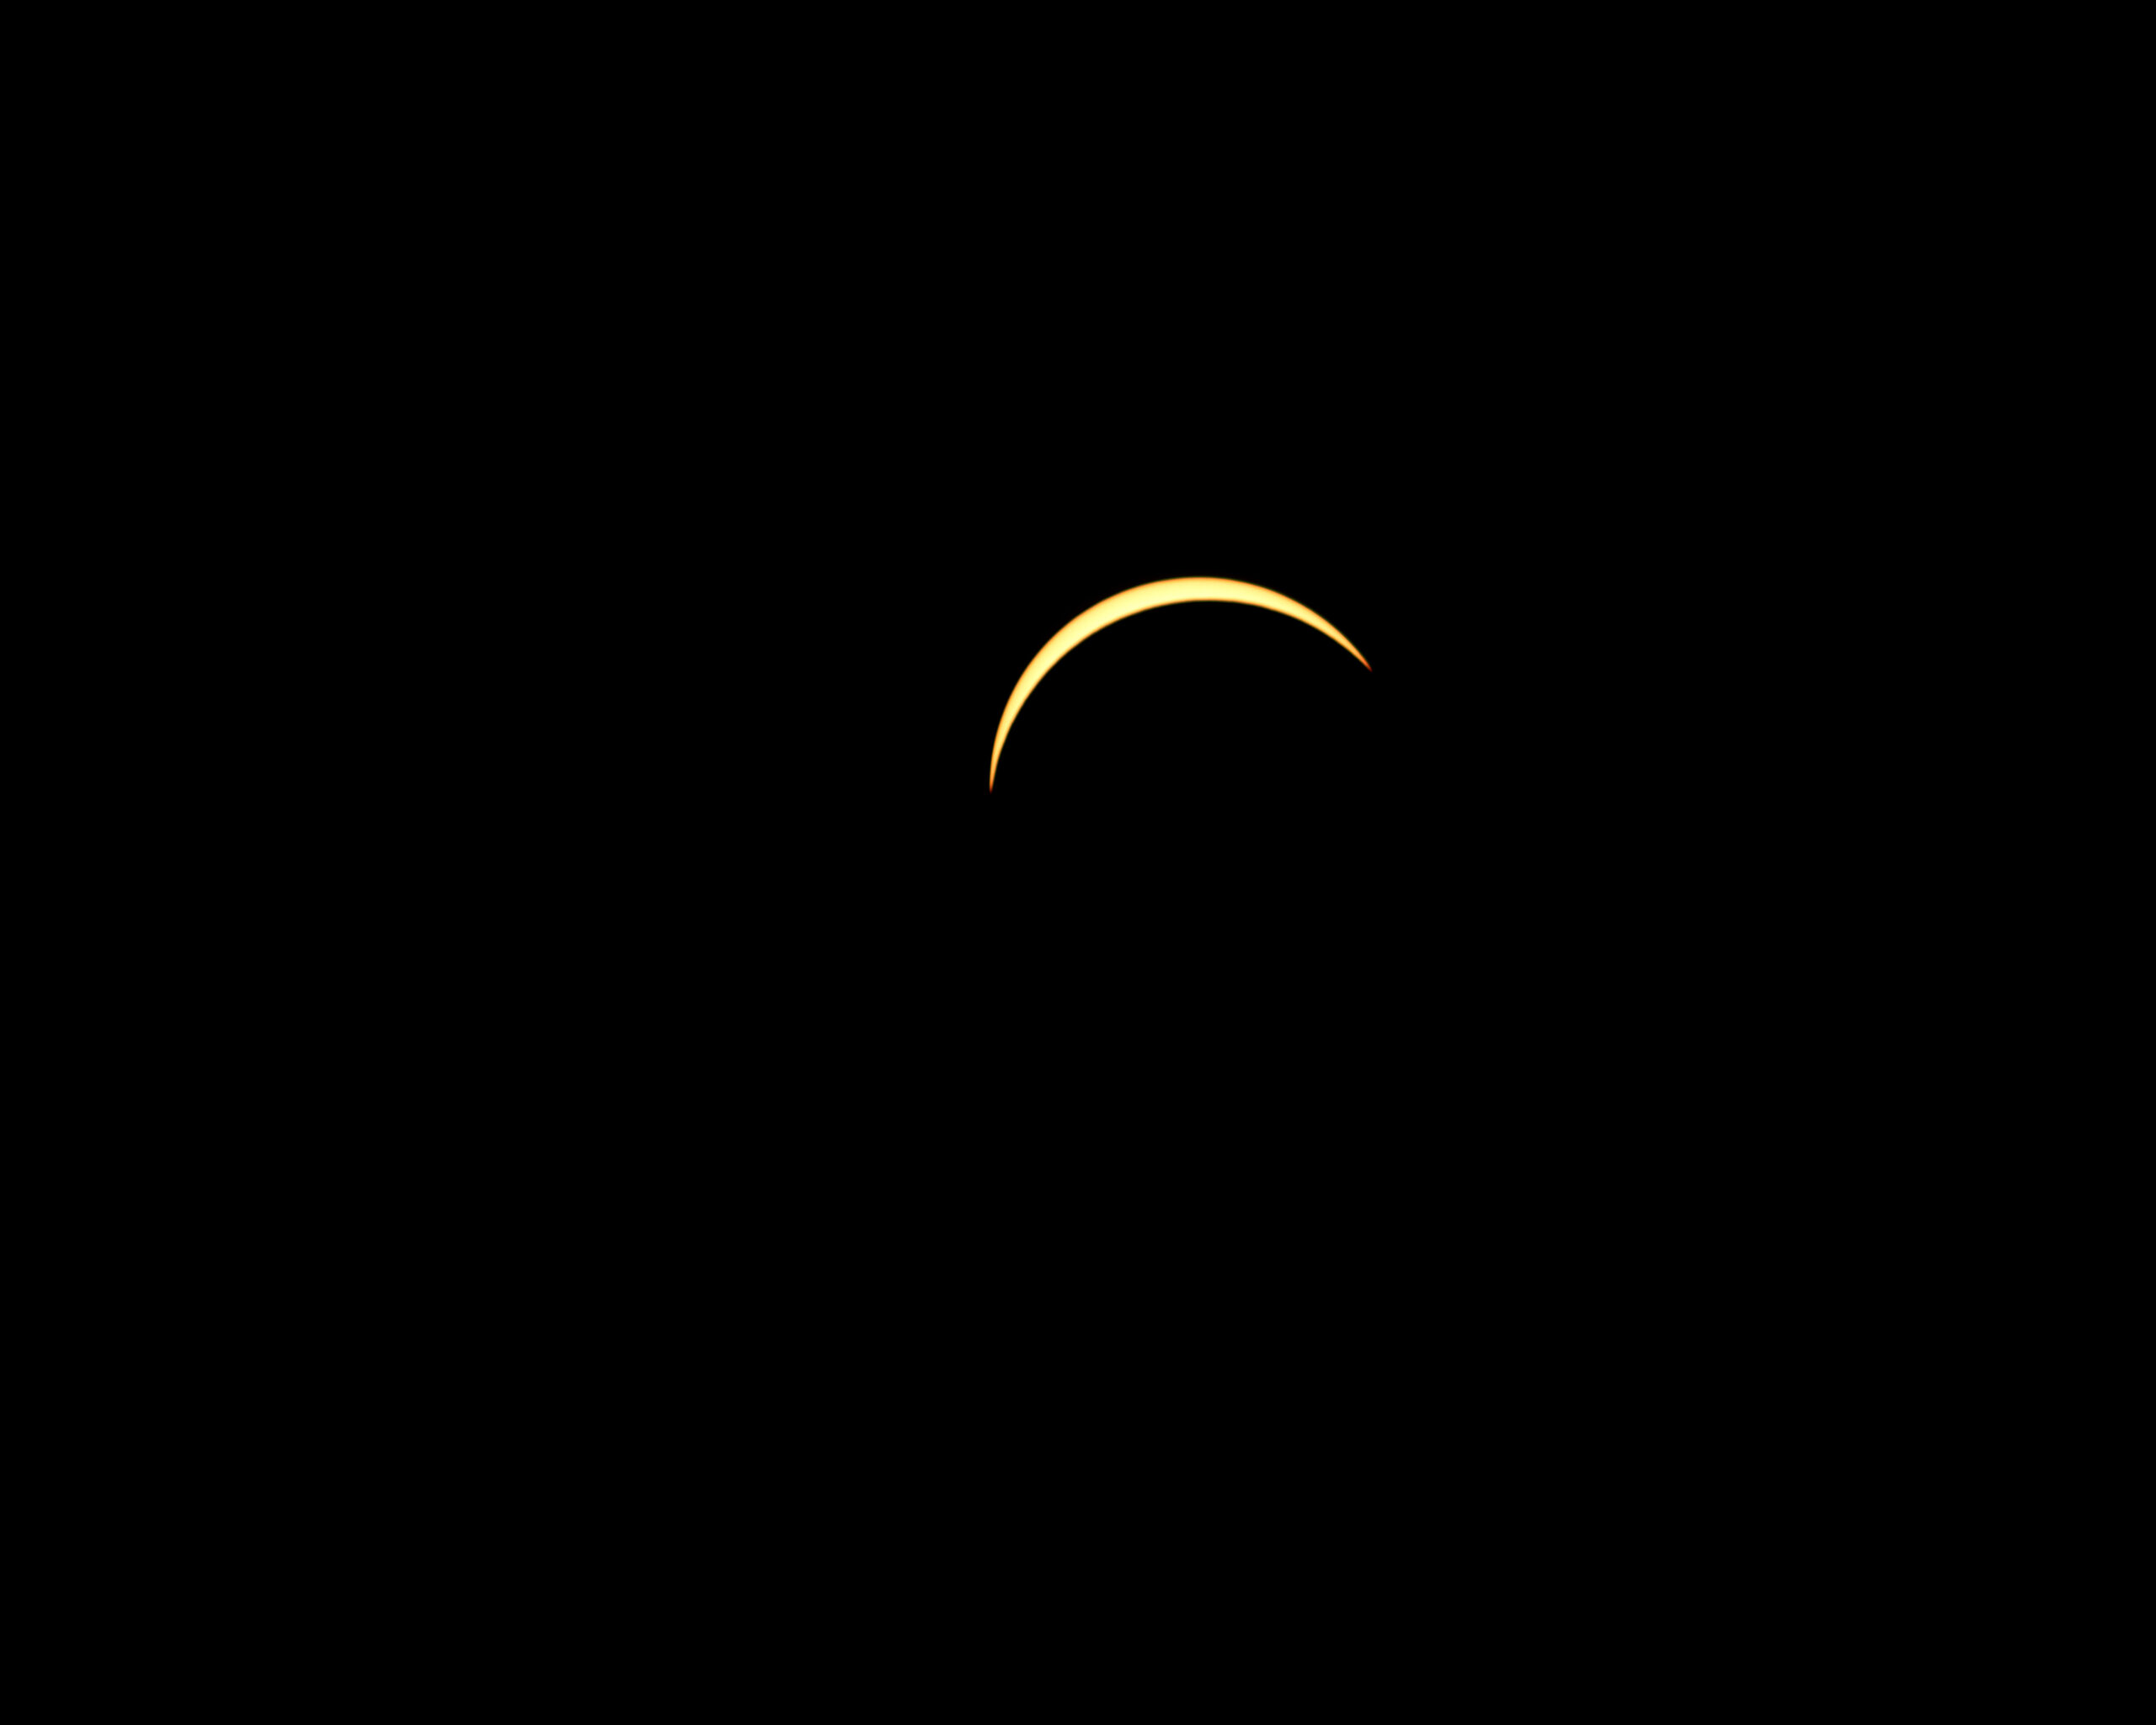
Baily’s Beads
-
The Diamond Ring Effect

Bibliography
Binoculars, Orion Telescopes &. 2019. “How to Polar Align Your Mount Using the Polar Alignment Scope – Orion Telescopes.” Youtube. May 20, 2019. https://www.youtube.com/watch?v=Q1p6yohys_0.
Brown, Russell Preston. 2017. “Solar Eclipse Imaging Techniques (Part 1) Current Adobe Photoshop Only.” Youtube. July 10, 2017. https://www.youtube.com/watch?v=Smn-fUJUadQ.
Goddard, Don. 2019. “How to Align Your Polar Scope on Your Equatorial Mount.” Youtube. September 6, 2019. https://www.youtube.com/watch?v=vQUYjsmI5lY.
Jubier, Xavier. n.d. “Baily’s Beads and Sky Simulations – Total Solar Eclipse of 2012 November 13-14 – Xavier Jubier.” Free.Fr. Accessed April 29, 2024a. http://xjubier.free.fr/en/site_pages/solar_eclipses/TSE_20121113_pg02_Baily_Beads_Simulation.html.
———. n.d. “Mexico – USA – 2024 April 8 Total Solar Eclipse – Interactive Google Map – Xavier Jubier.” Free.Fr. Accessed April 29, 2024b. http://xjubier.free.fr/en/site_pages/solar_eclipses/TSE_2024_GoogleMapFull.html.
———. n.d. “Solar Eclipse Time Exposure Calculator – Xavier Jubier.” Free.Fr. Accessed April 29, 2024c. http://xjubier.free.fr/en/site_pages/SolarEclipseExposure.html.
Nebula Photos. 2022. “Hi-Tech GO-TO Star Trackers Are Here!” Youtube. October 26, 2022. https://www.youtube.com/watch?v=fj3carj27ag.
———. 2023a. “Preparing for the 2024 Total Solar Eclipse, Part 1.” Youtube. June 30, 2023. https://www.youtube.com/watch?v=lEL1m91odvY.
———. 2023b. “Preparing for the 2024 Total Solar Eclipse, Pt. 2 (Equipment and Making Custom Solar Filters).” Youtube. August 29, 2023. https://www.youtube.com/watch?v=t89dN92u39s.
———. 2024a. “Preparing for the 2024 Total Solar Eclipse, Pt. 3 (Full Practice Run with Basic Kit).” Youtube. February 16, 2024. https://www.youtube.com/watch?v=E0HZJZzccUM.
———. 2024b. “Preparing for the 2024 Total Solar Eclipse, Pt. 4 (Star Tracker Tips Incl. Daytime Polar Alignment).” Youtube. February 28, 2024. https://www.youtube.com/watch?v=zfL0phpISAM.
Sky-Watcher, U. S. A. 2022. “Sky-Watcher What’s Up? Webcast: SynScan Pro App Overview.” Youtube. May 13, 2022. https://www.youtube.com/watch?v=n4OhUVNPVaE.
“Solar Eclipse Timer App.” n.d. Solareclipsetimer.com. Accessed April 30, 2024. https://www.solareclipsetimer.com.
Telescopes, O. P. T. 2020. “How to Polar Align Your Equatorial Mount!” Youtube. September 9, 2020. https://www.youtube.com/watch?v=YjvDNMmdMOI.
Zelinka, Peter. 2019. “Sky-Watcher Star Adventurer – Polar Alignment Tutorial.” Youtube. January 20, 2019. https://www.youtube.com/watch?v=5Yk-Zm4FT7w.
N.d. Skyandtelescope.org. Accessed April 29, 2024. https://skyandtelescope.org/astronomy-blogs/imaging-foundations-richard-wright/astrophotography-rule-of-500-how-long/.