After using the adapter for a few days, I was developing a better understanding of the adapter, that informed further experimentation.
My key objective was to see how well the FujiFilm View Camera Adapter G works, whether there are any specific constraints, and to determine a set of viable use cases. The basic definition of how well the adapter works is determined initially based on previous experience with 4×5 film. That is by matching the operational characteristics and performance of the digitalback relative to the traditional film back. Beyond this, any additional benefits realized or limitations would complement the final assessment.
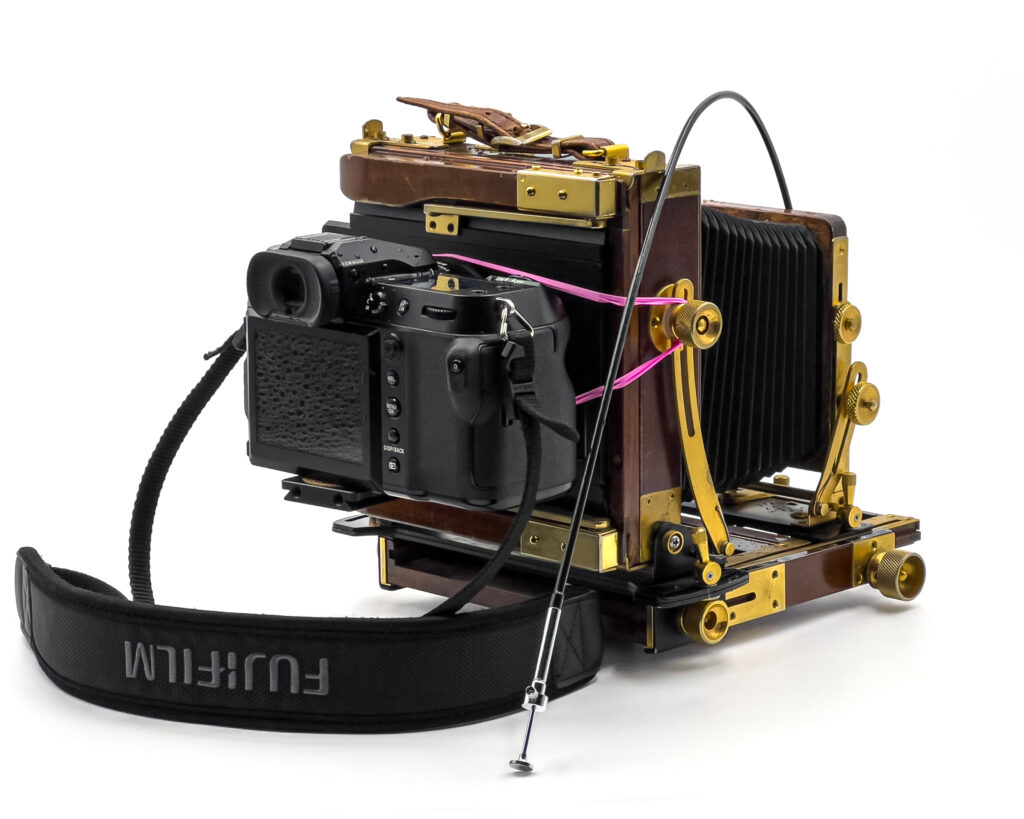
About the Adapter:
- it replaces the film holder:
- The adapter enables the “film sensor” on the back of the field camera to be replaced with a “digital sensor” (i.e., a Fujifilm GFX 100s Camera)
- portrait or landscape alignment
- the camera can be mounted on the adapter in either a portrait or landscape orientation
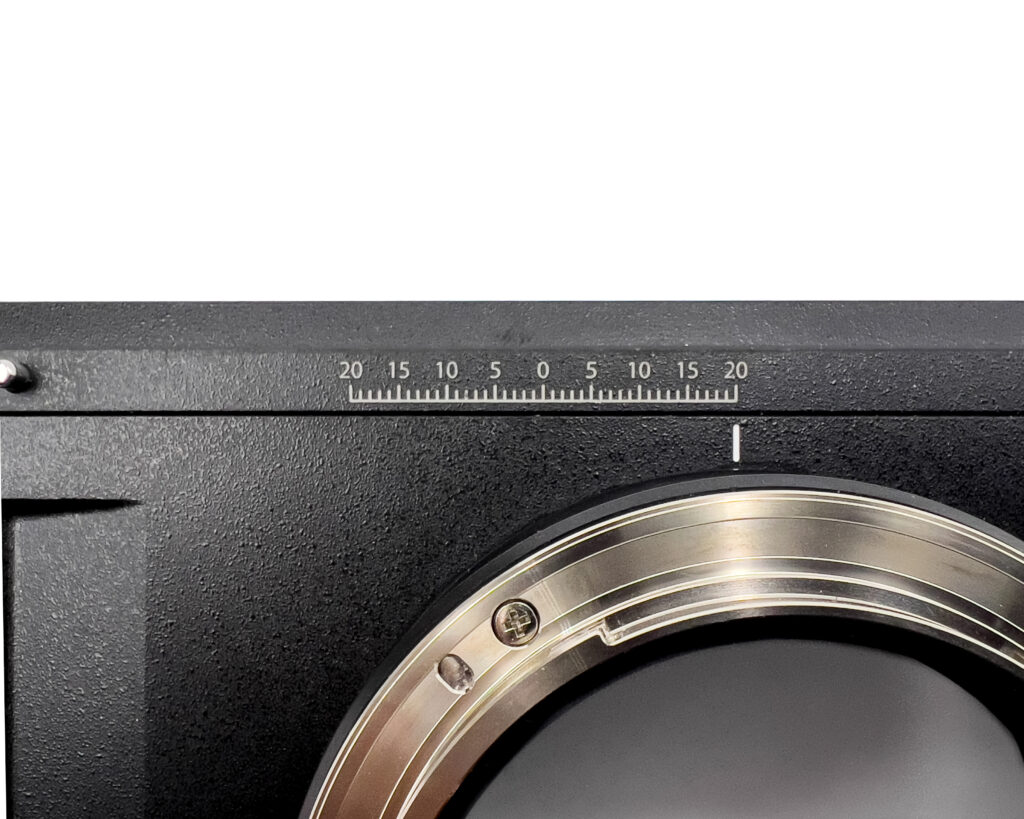
- horizontal (backplane) movement
- the adapter allows for horizontal movement of the camera back. This enables one to capture a horizontal chord of the light circle
- co-ordination with the lens board movements
- by sliding the lens board up and down, it is possible to co-ordinate these movements with those of the adapter, to create a “grid” of shots that when merged together cover the same area of the light circle that would 4×5 film.

In large part, the motivation to look at a digitalback is to overcome the challenges of film:
- Cost and availability: over the last several years, the product options for sheet film have become more limited and it is becoming more expensive to purchase and to develop: costs have nearly tripled from about $5/sheet to over $13.
- Lack of immediacy: it takes, at best hours (if developing yourself), but more often days, before film can be developed.
- Points of failure: there are several points of failure in the process of using film, including: loading film into the film cartridges, improper loading of the film cartridge into the camera; improper exposure; light leaks; improper development; damage to negative.
- Experimentation: the lack of immediacy in seeing the results makes quick iteration on site nearly impossible.
- Scanning: the negatives need to be scanned, which is another step in an already long process.
- Technical constraints: such as shutter speed, which in my case is limited to 1/500th of a second, and ISO.
- Setup time: A view camera takes time to set up, regardless of whether film or digital technologies are used. However, the digitalback does alleviate the need for light readings and frequent readjustments as conditions change (furthermore, different “cells” of the image grid can be metered separately)
Digital is not without it’s challenges as well:
- Multiple shots: multiple shots are required to capture a single 4×5 frame. Typically, the shots are organized into a grid; I have used several different configurations, including a 2×2, 2×3 and 3×3 grid of shots. The necessity of multiple shots of course has implications on the nature of the photographs one can engage. For example, landscapes might be a more viable choice than action photography.
- Tripod. You can’t shoot a grid without using a tripod. Having said that, it is unusual to use a large format camera without a tripod in any case, but while it may be optional / preferred with film, it is mandatory with digital when you want to stitch together multiple shots.
- Adapter Design: the adapter “raises” the digitalback off the surface of the film plane, essentially acting like an extension tube. This design characteristic is required to make room for the handgrip so the camera has room to fit on to the back. However, like an extension tube, the net result is a zooming affect.
- Minimum focal length. As the plane of the digital sensor is set back, as noted above, the bellows need to be compressed to compensate, which in turn increases the minimum focal length of lens one can use. Using film, my camera is able to support a minimum 75mm lens. Using the adapter increases that minimum. Some have suggested that 135mm might be the minimum, however, I am using a 21mm recessed lens board on my 150mm lens (to allow more bellows extension) and suspect that that 135mm minimum can be reduced. I can attest 75mm is too short, but 90mm might work.
- The adapter is not fully compatible with my Tachihara Field Camera. While it fits and there are no light leaks, the connection with the field camera is not solid or firm. It requires some adaptations to secure the connection. I use rubber bands.
Leave a Reply